 |
|
Below are some exercises to get you started today. After a 5-10 minute warmup (this can consist of walking, easy cycling, an elliptical machine, etc.), try these in the order listed. This will allow you to activate the smaller muscles before moving to the next exercise. Feel free to be indoors or outdoors, just be somewhere you feel comfortable with no distractions. This is for YOU.
Table of Contents - Exercises
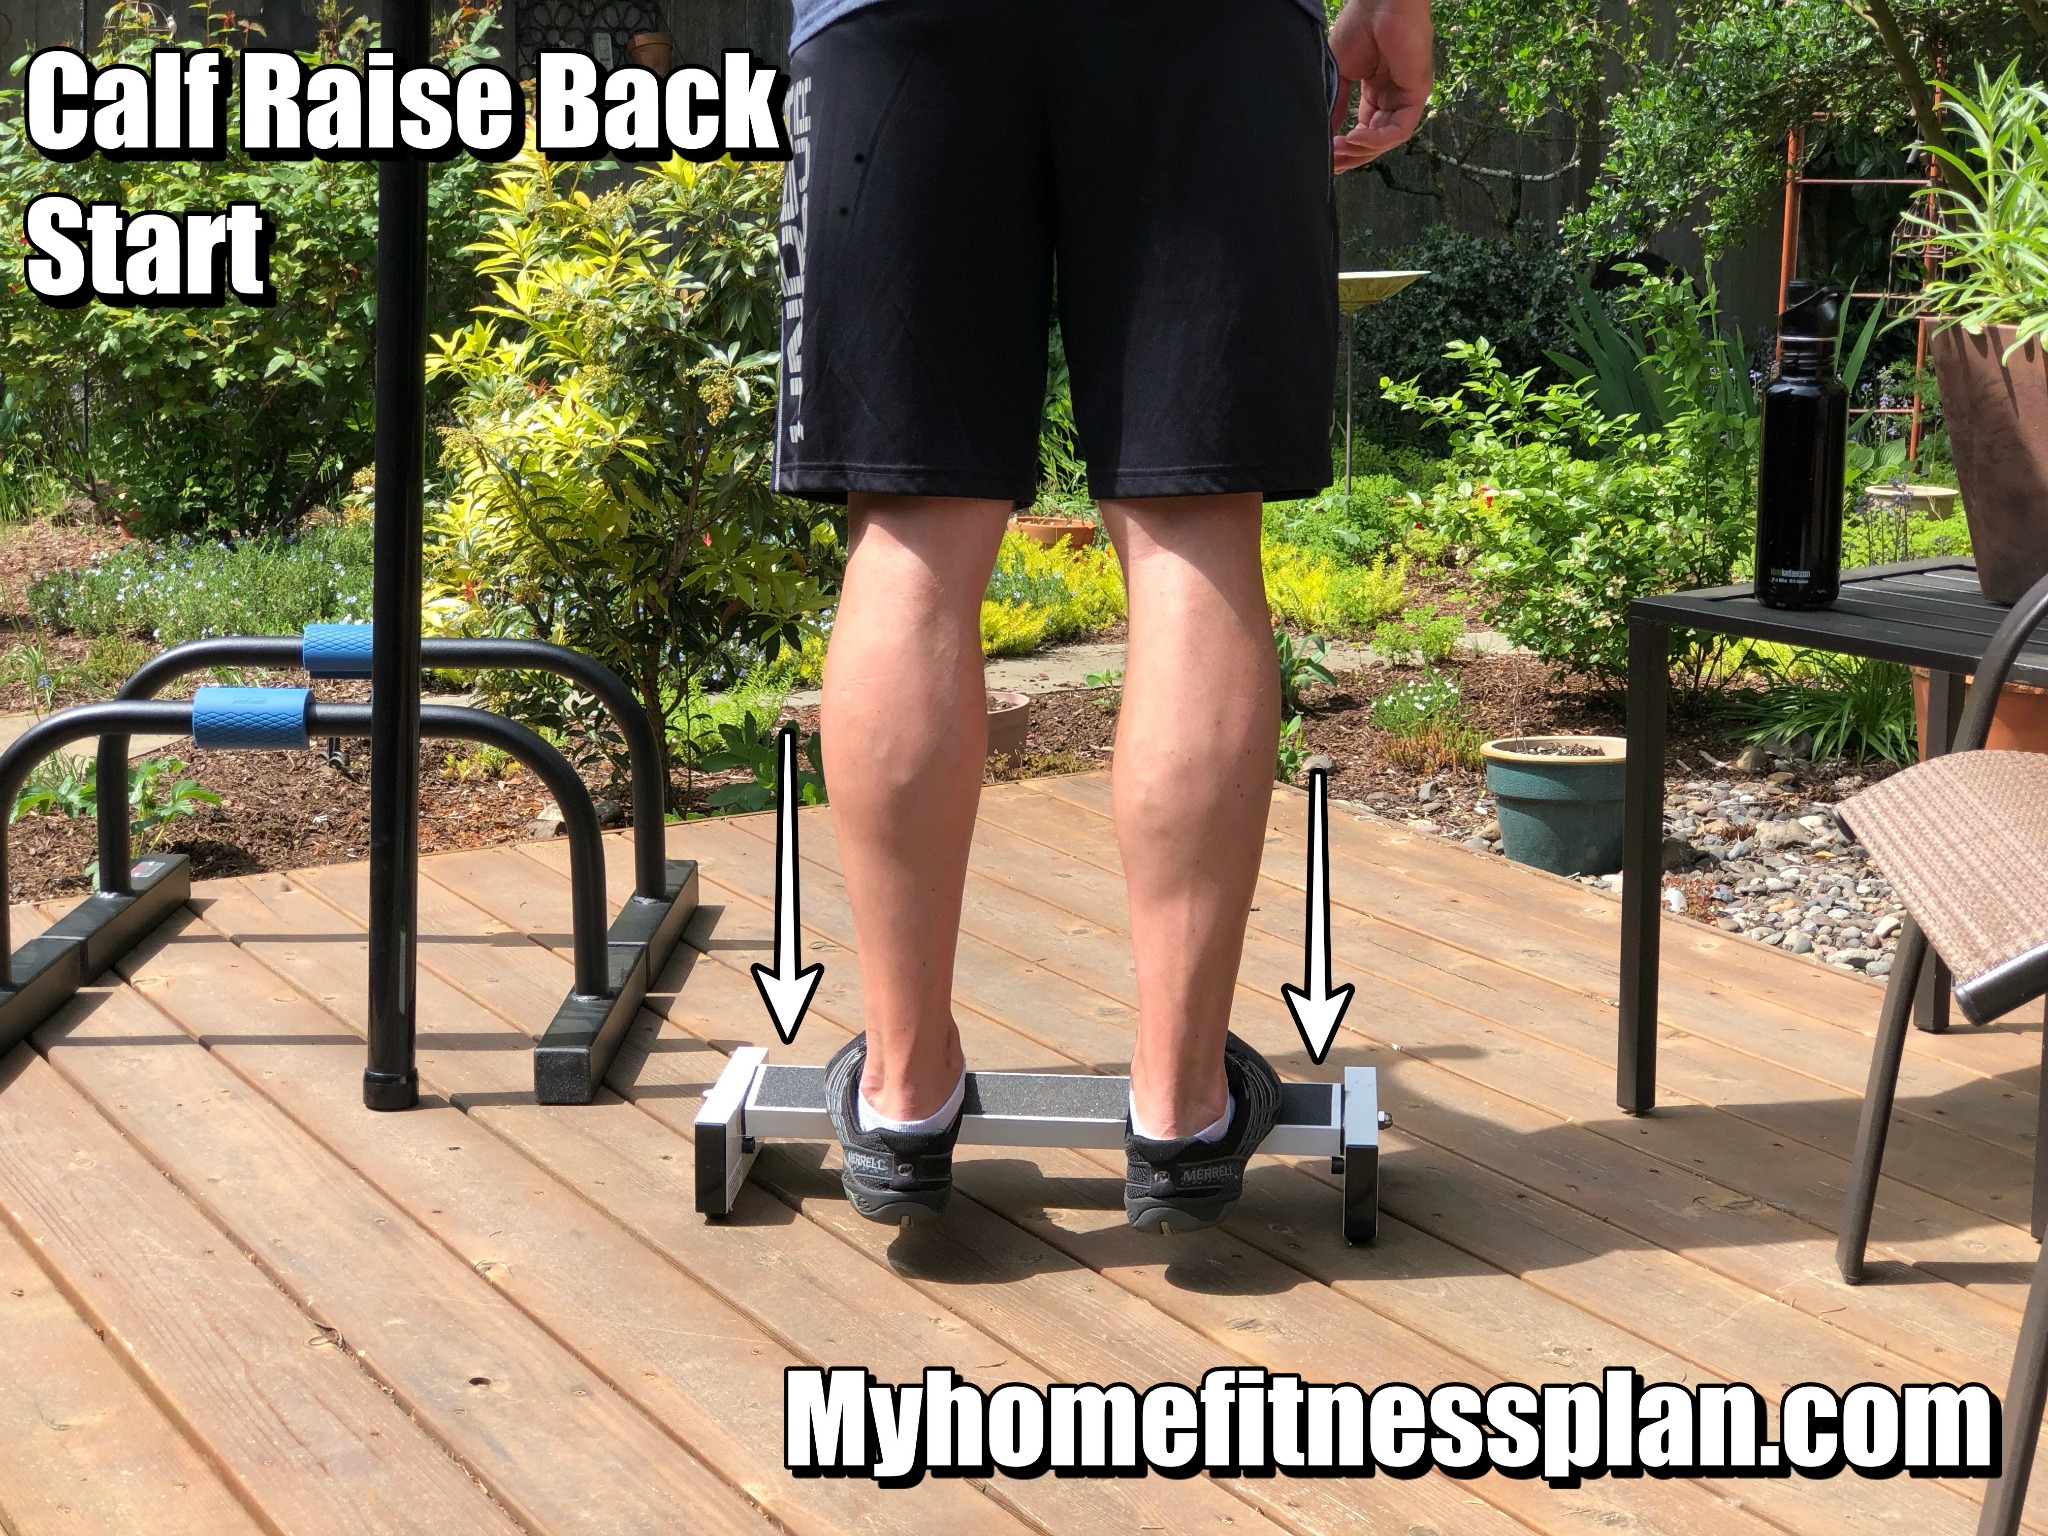
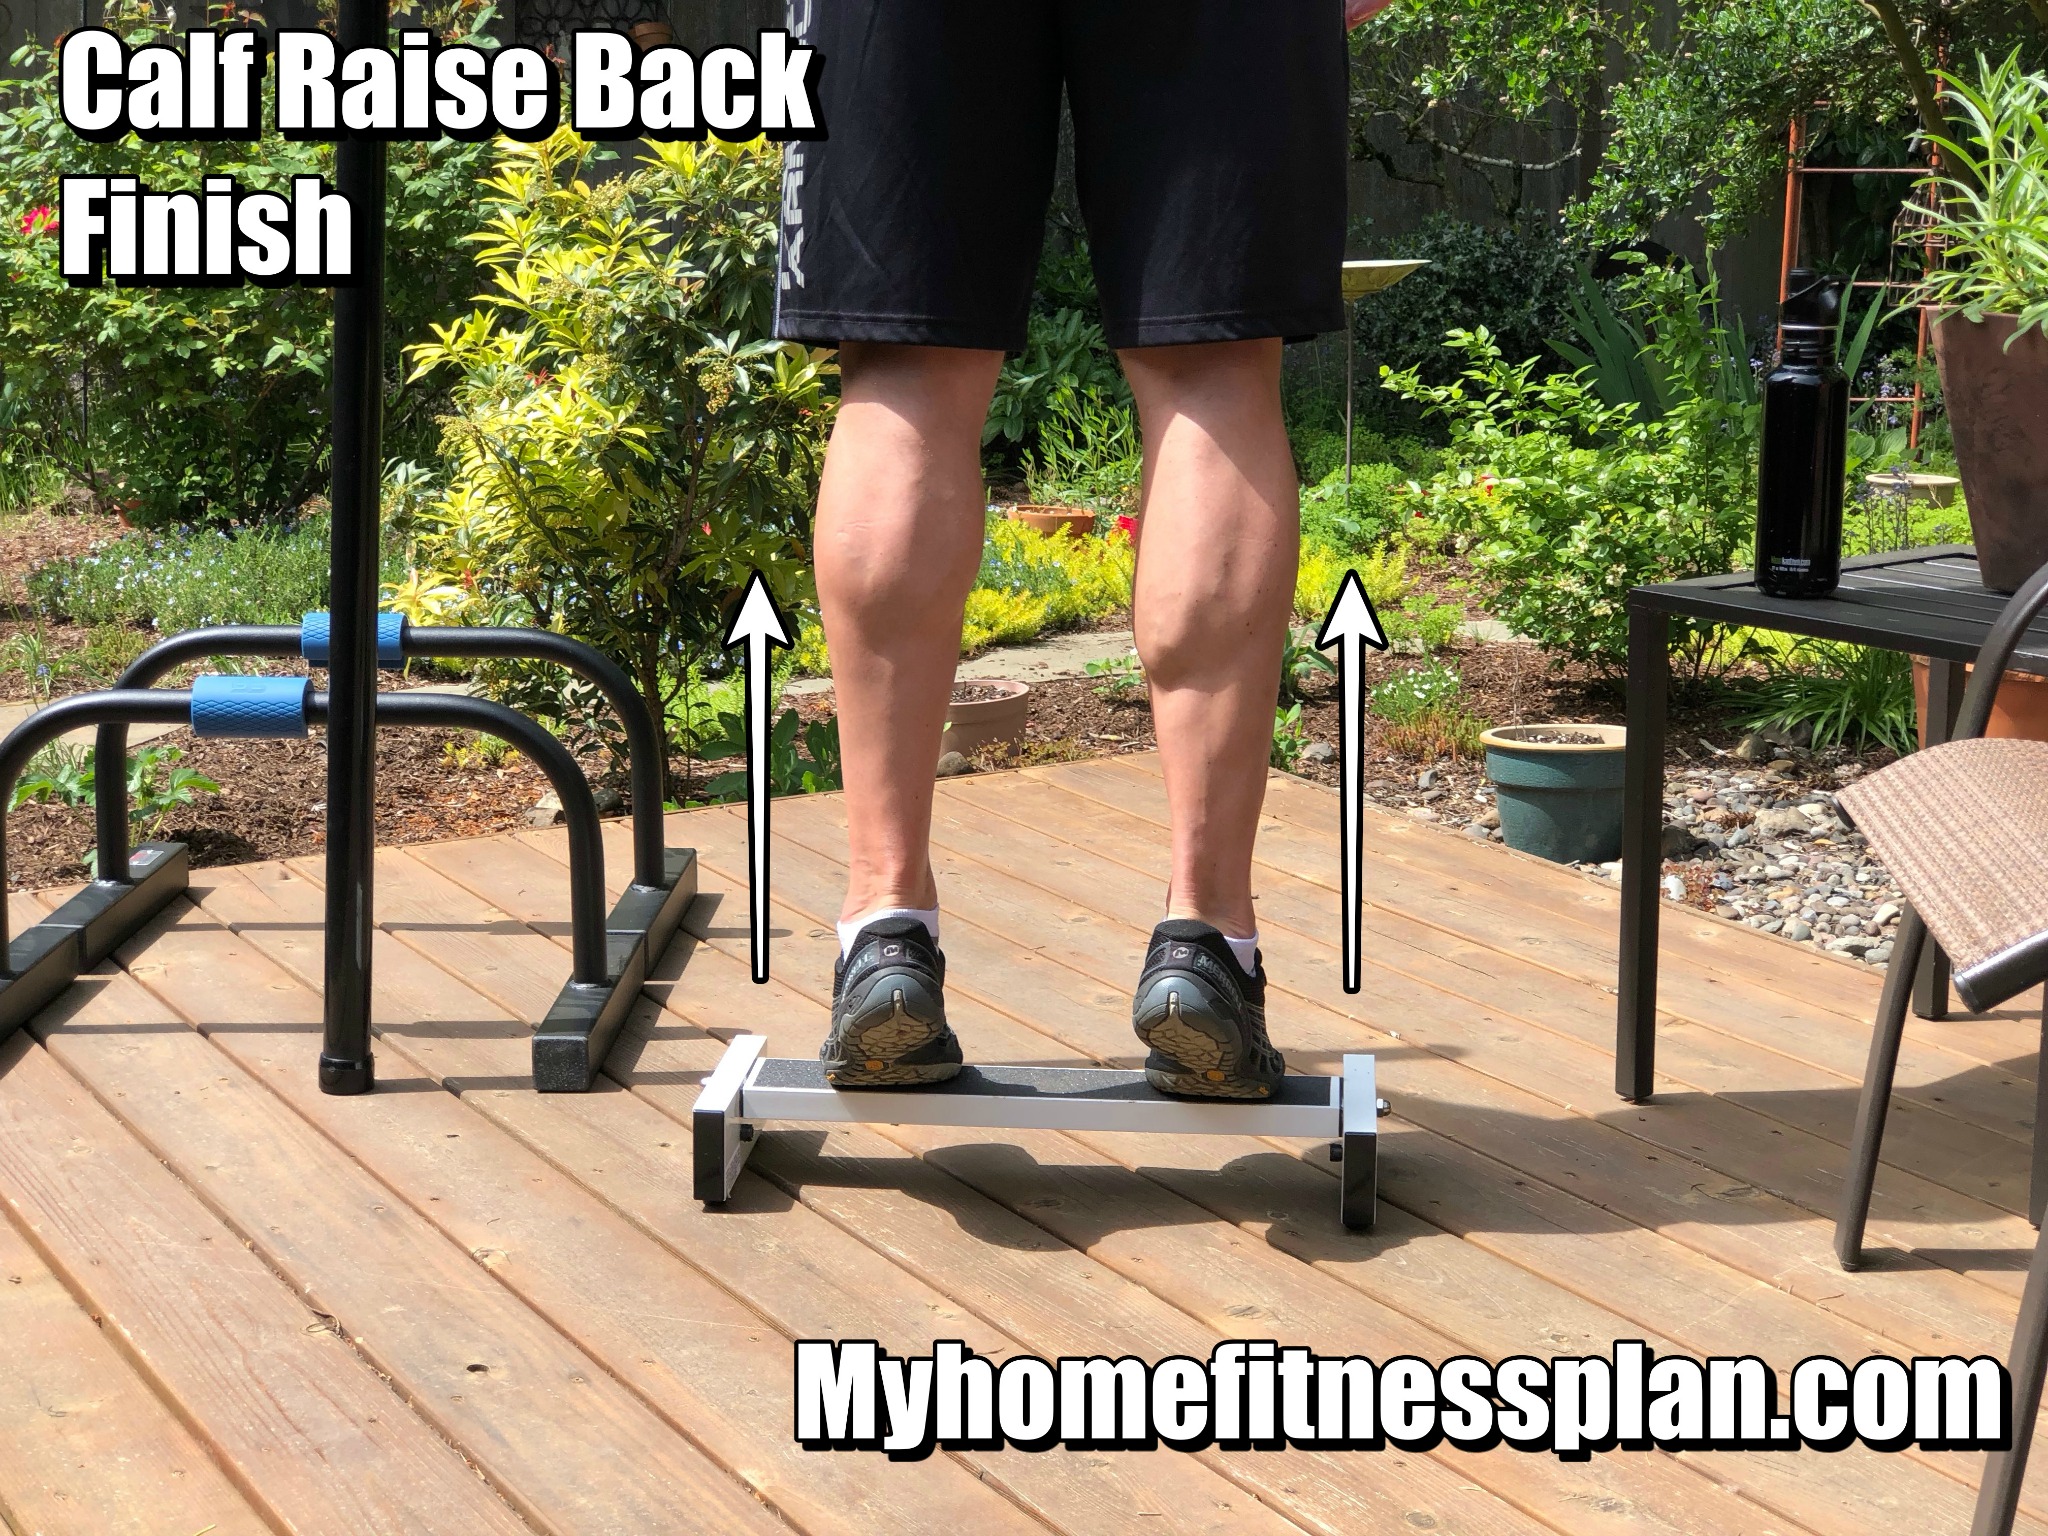
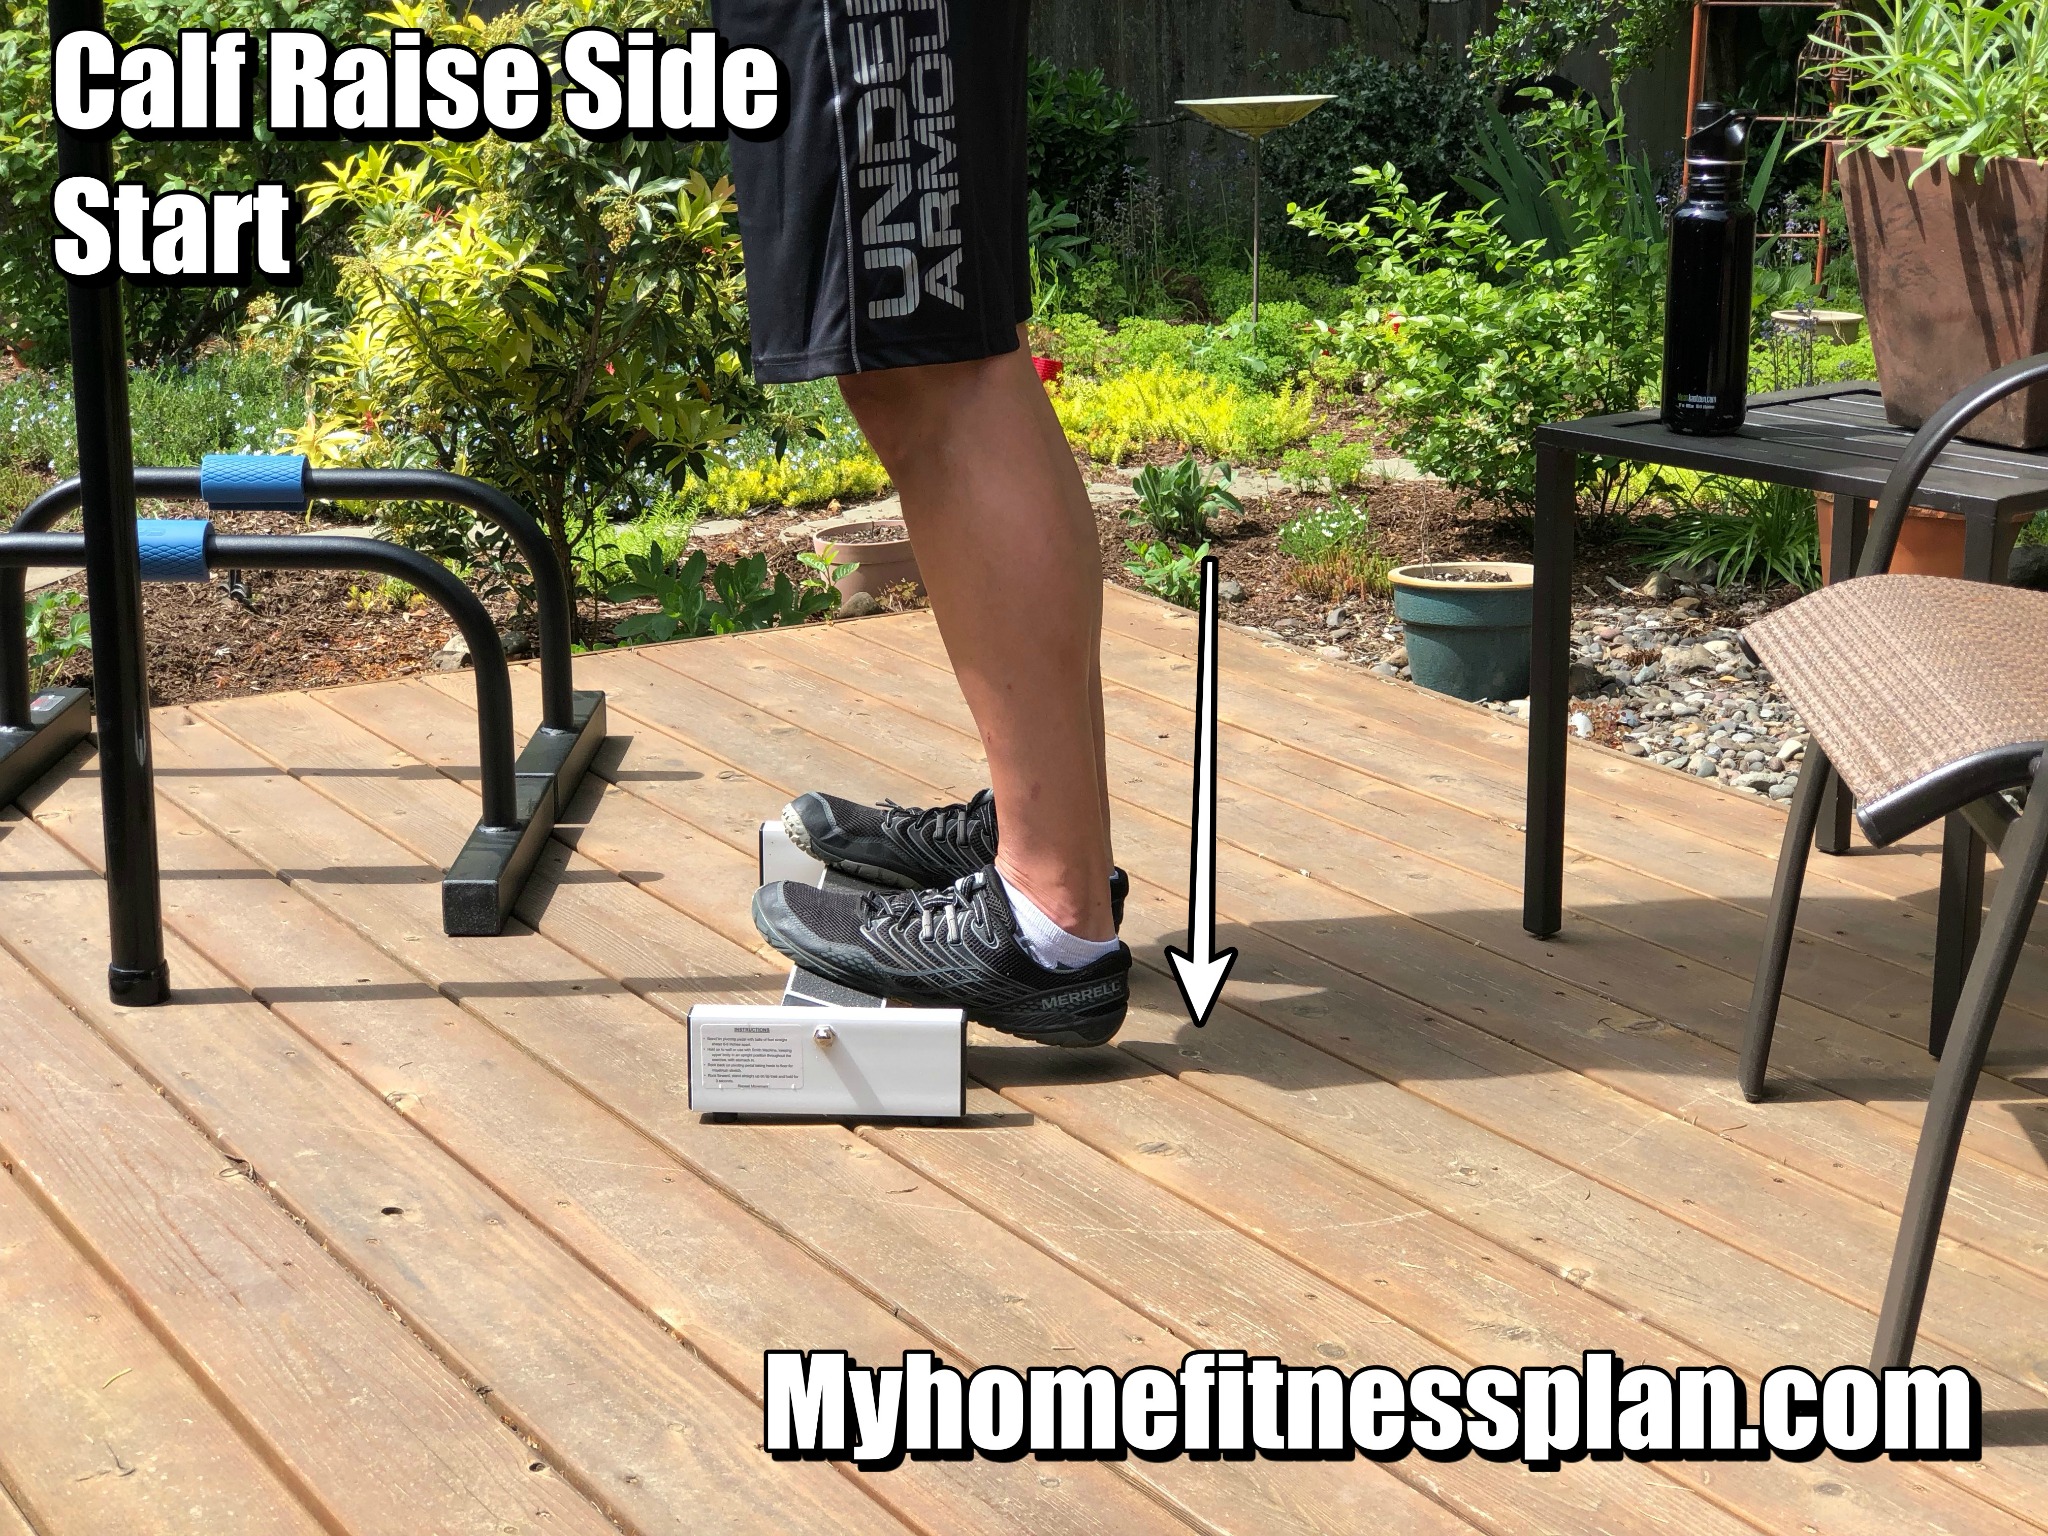
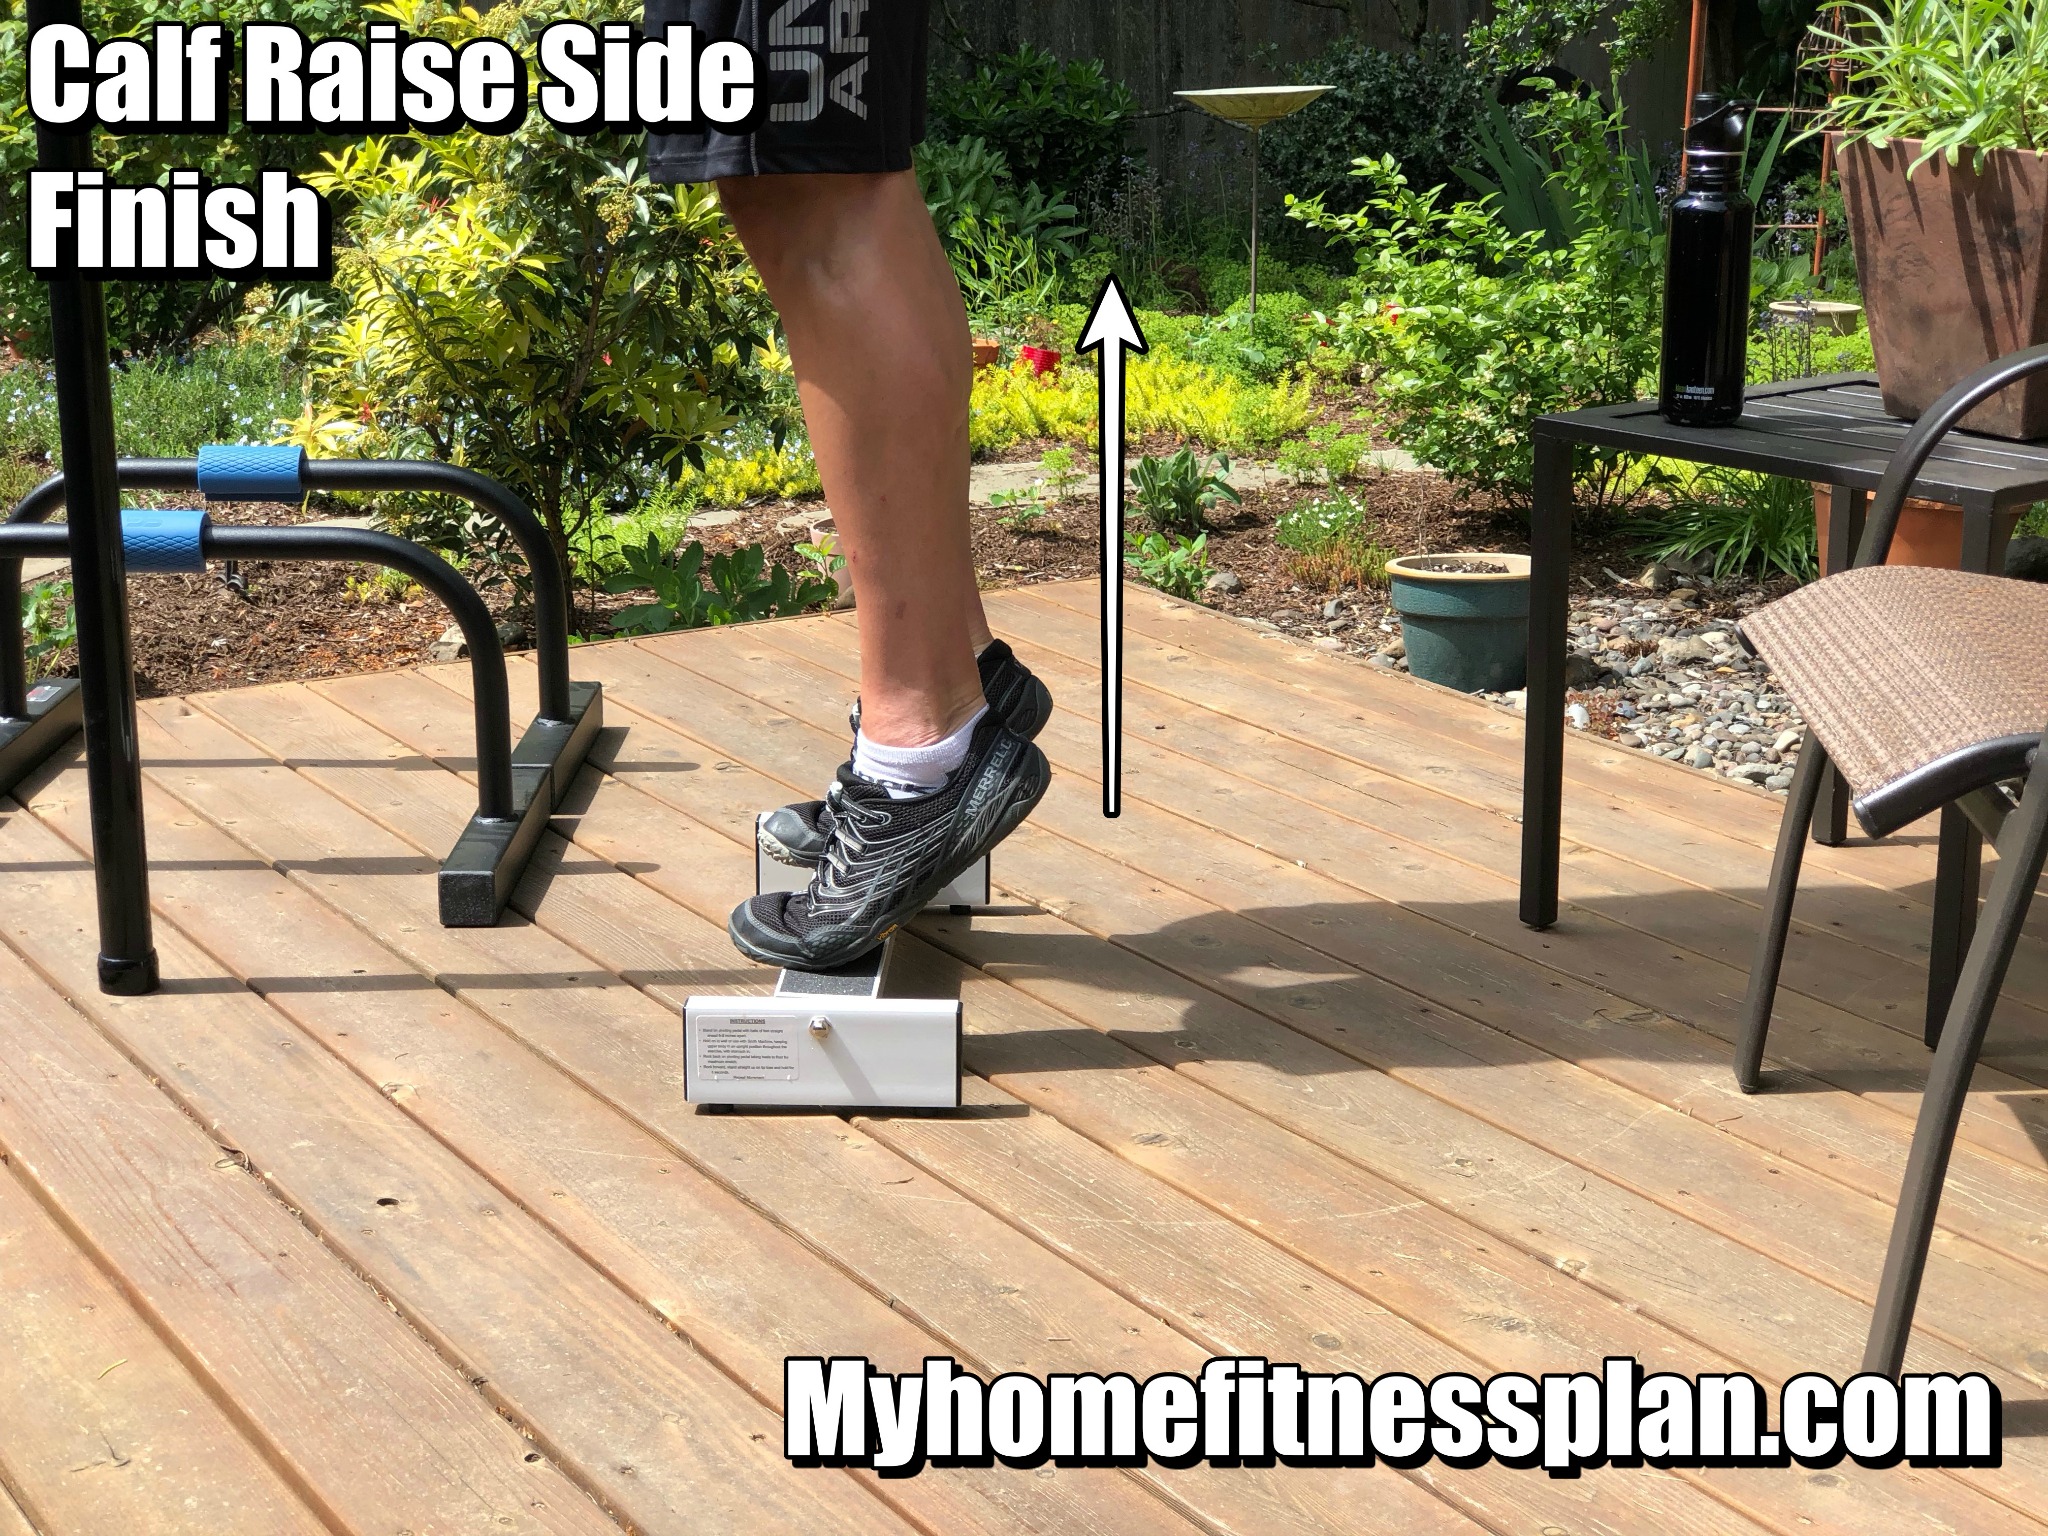
1. Calf Raise (also known as a Heel Raise)
Equipment required- Step or block that you can SAFELY stand on.
Benefits- Strengthens the gastrocnemius muscle and helps to prevent the achilles tendon from becoming shortened. It's especially beneficial if you normally wear heels or other footwear elevated at the heel.
How to perform-
- Stand tall. Push your big toes into the step or block.
- Have a very slight bend in the knees. Hold onto a stable waist or chest high object for balance and safety.
- Begin the movement by SLOWLY lowering both heels at the same time toward the floor. Very important NOT TO BOUNCE out of the bottom of the movement.
- Hold for a second or two at the bottom to feel a stretch in the calf muscle and achilles tendon.
- SLOWLY begin to change direction and lift the heels as high you are able. Remember: continue to focus on pushing the big toe down towards the ground.
NOTE: If working one leg at time, maintain the very slight bend (10 degrees or less) in the knee of the working leg and let the ‘resting’ leg remain elevated off the ground with as little movement as possible. Take deep breaths into your abdomen (NO shallow chest breathing). Remember that working muscles need oxygen. Breathe...all the time.
Number of repetitions- 8 - 12 total or, if using a stopwatch, 45 - 90 seconds per set.
Beginner - 8 - 12 repetitions using both legs at the same time.
Intermediate - 8 - 12 repetitions using one leg at a time.
Advanced - 8 - 12 repetitions using one leg at a time and holding a dumbbell or kettlebell. Hold the extra weight with same hand as the leg you are working--this maximizes the work performed by the muscle as the weight is traveling in a more ‘straight up and down’ fashion instead of pulling slightly across your body as can happen when the weight increases.
Fun fact- The contraction of the calf muscle by walking, running or performing calf raises pushes blood back toward the heart. It's a great way to get the blood flowing after sitting for an extended period of time. So the next time you're on a long flight, stand up next to your seat and do 15-20 repetitions to get some blood flow in your lower extremities.
|
Prefer to watch the instructional videos instead? Click HERE! |
2. Hip Mobility
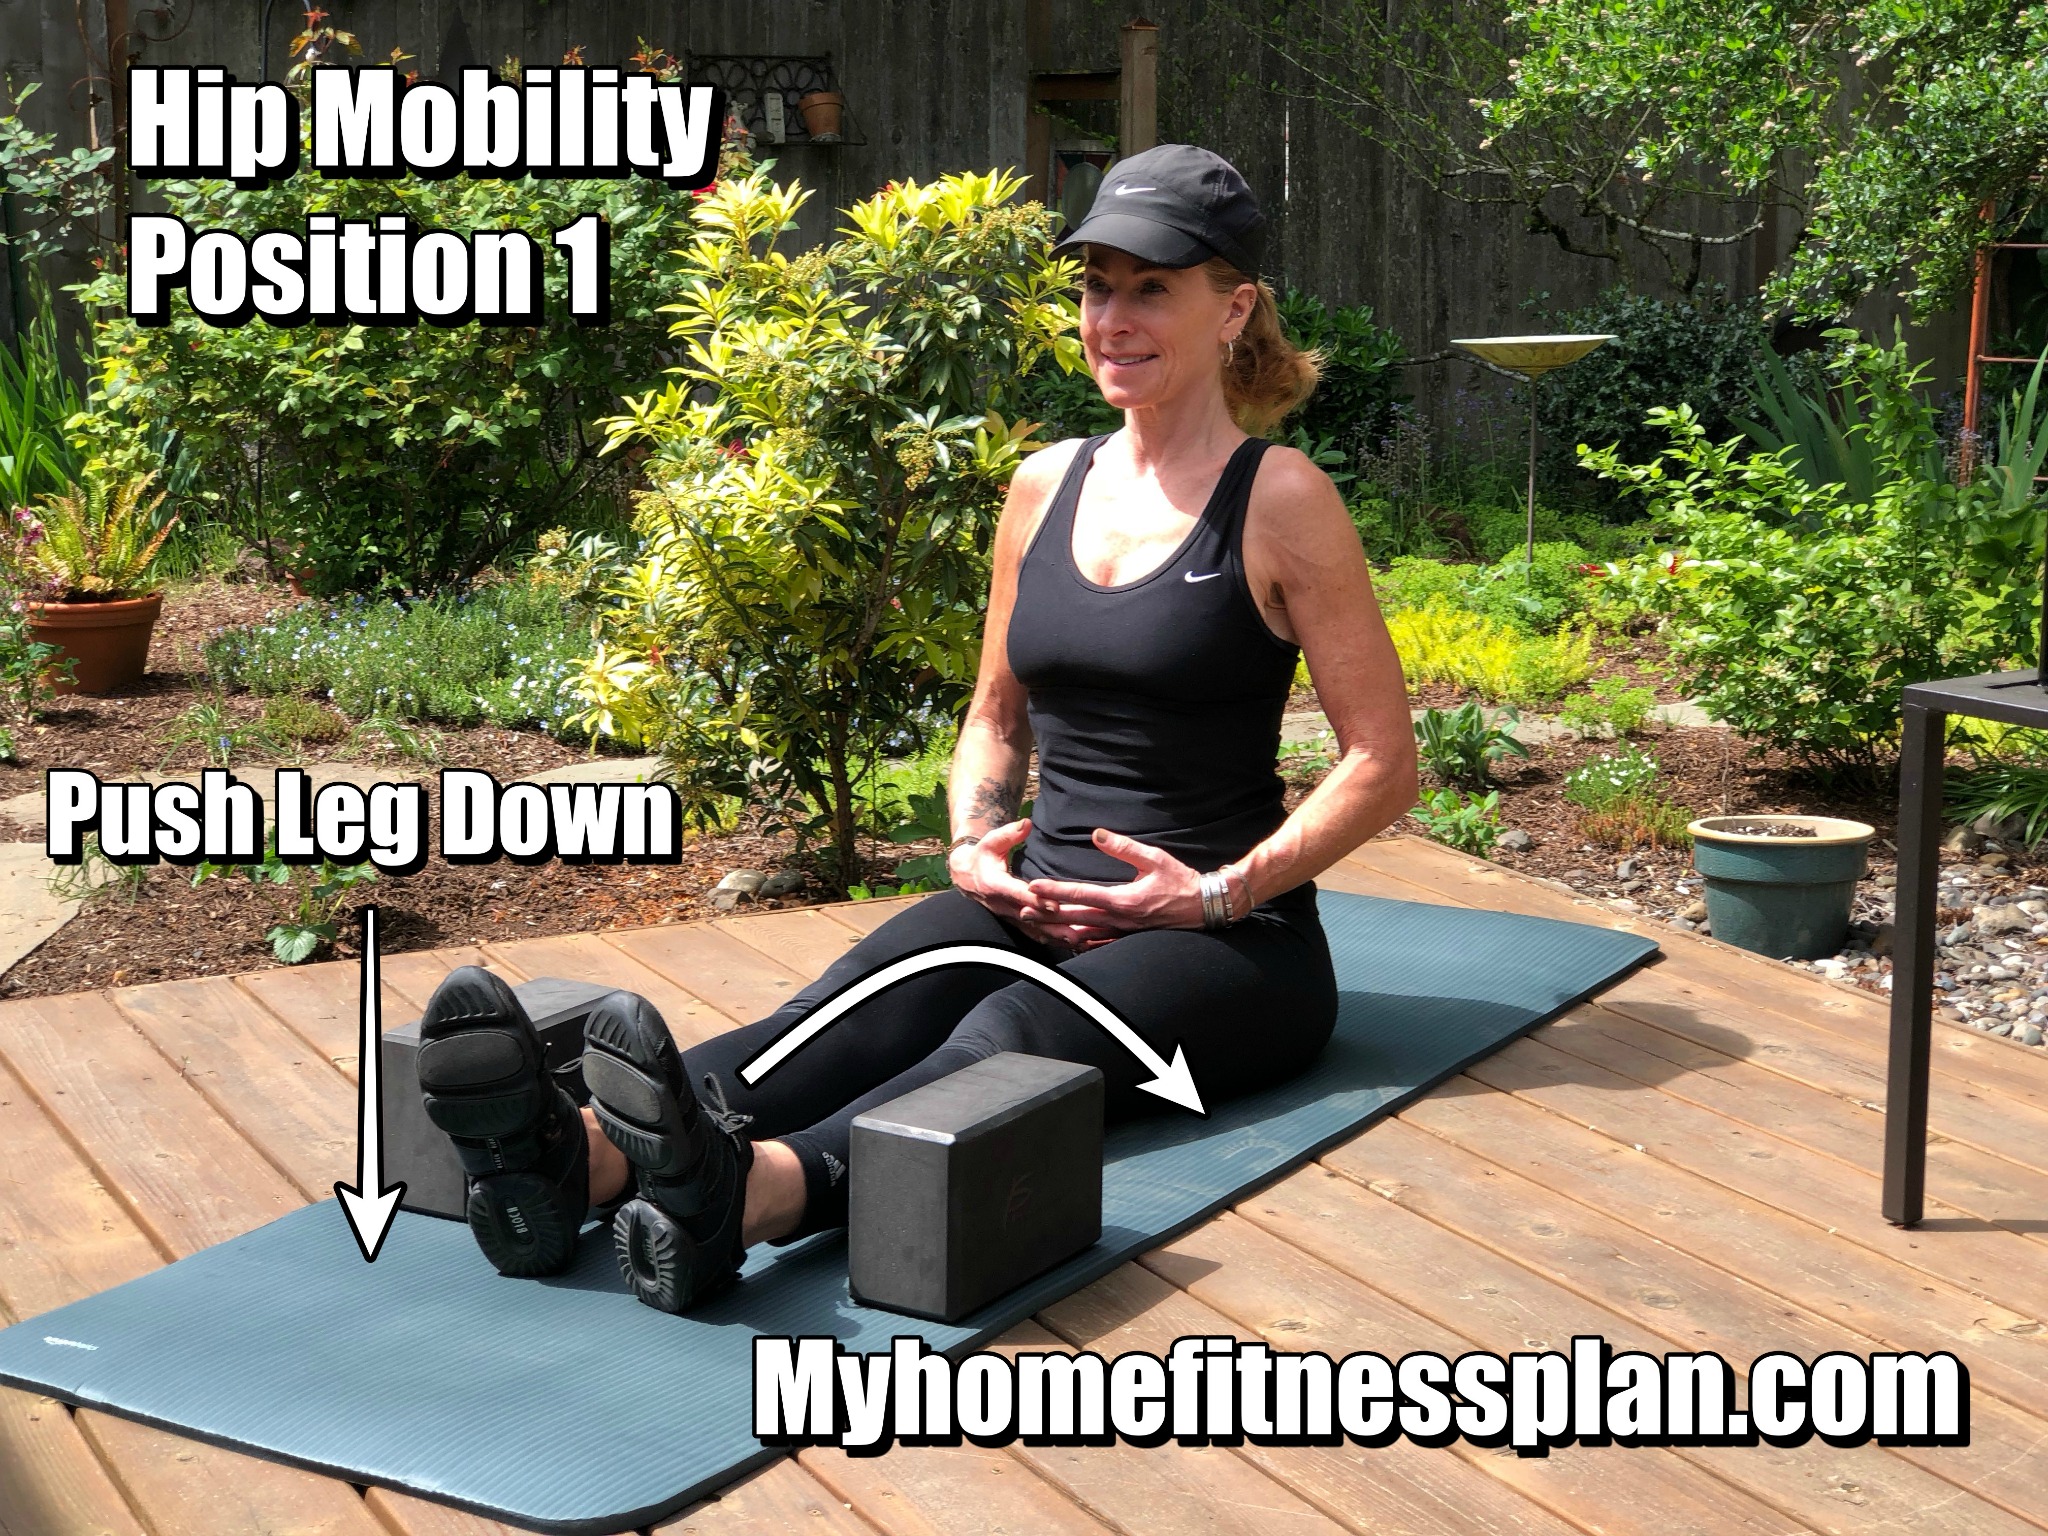
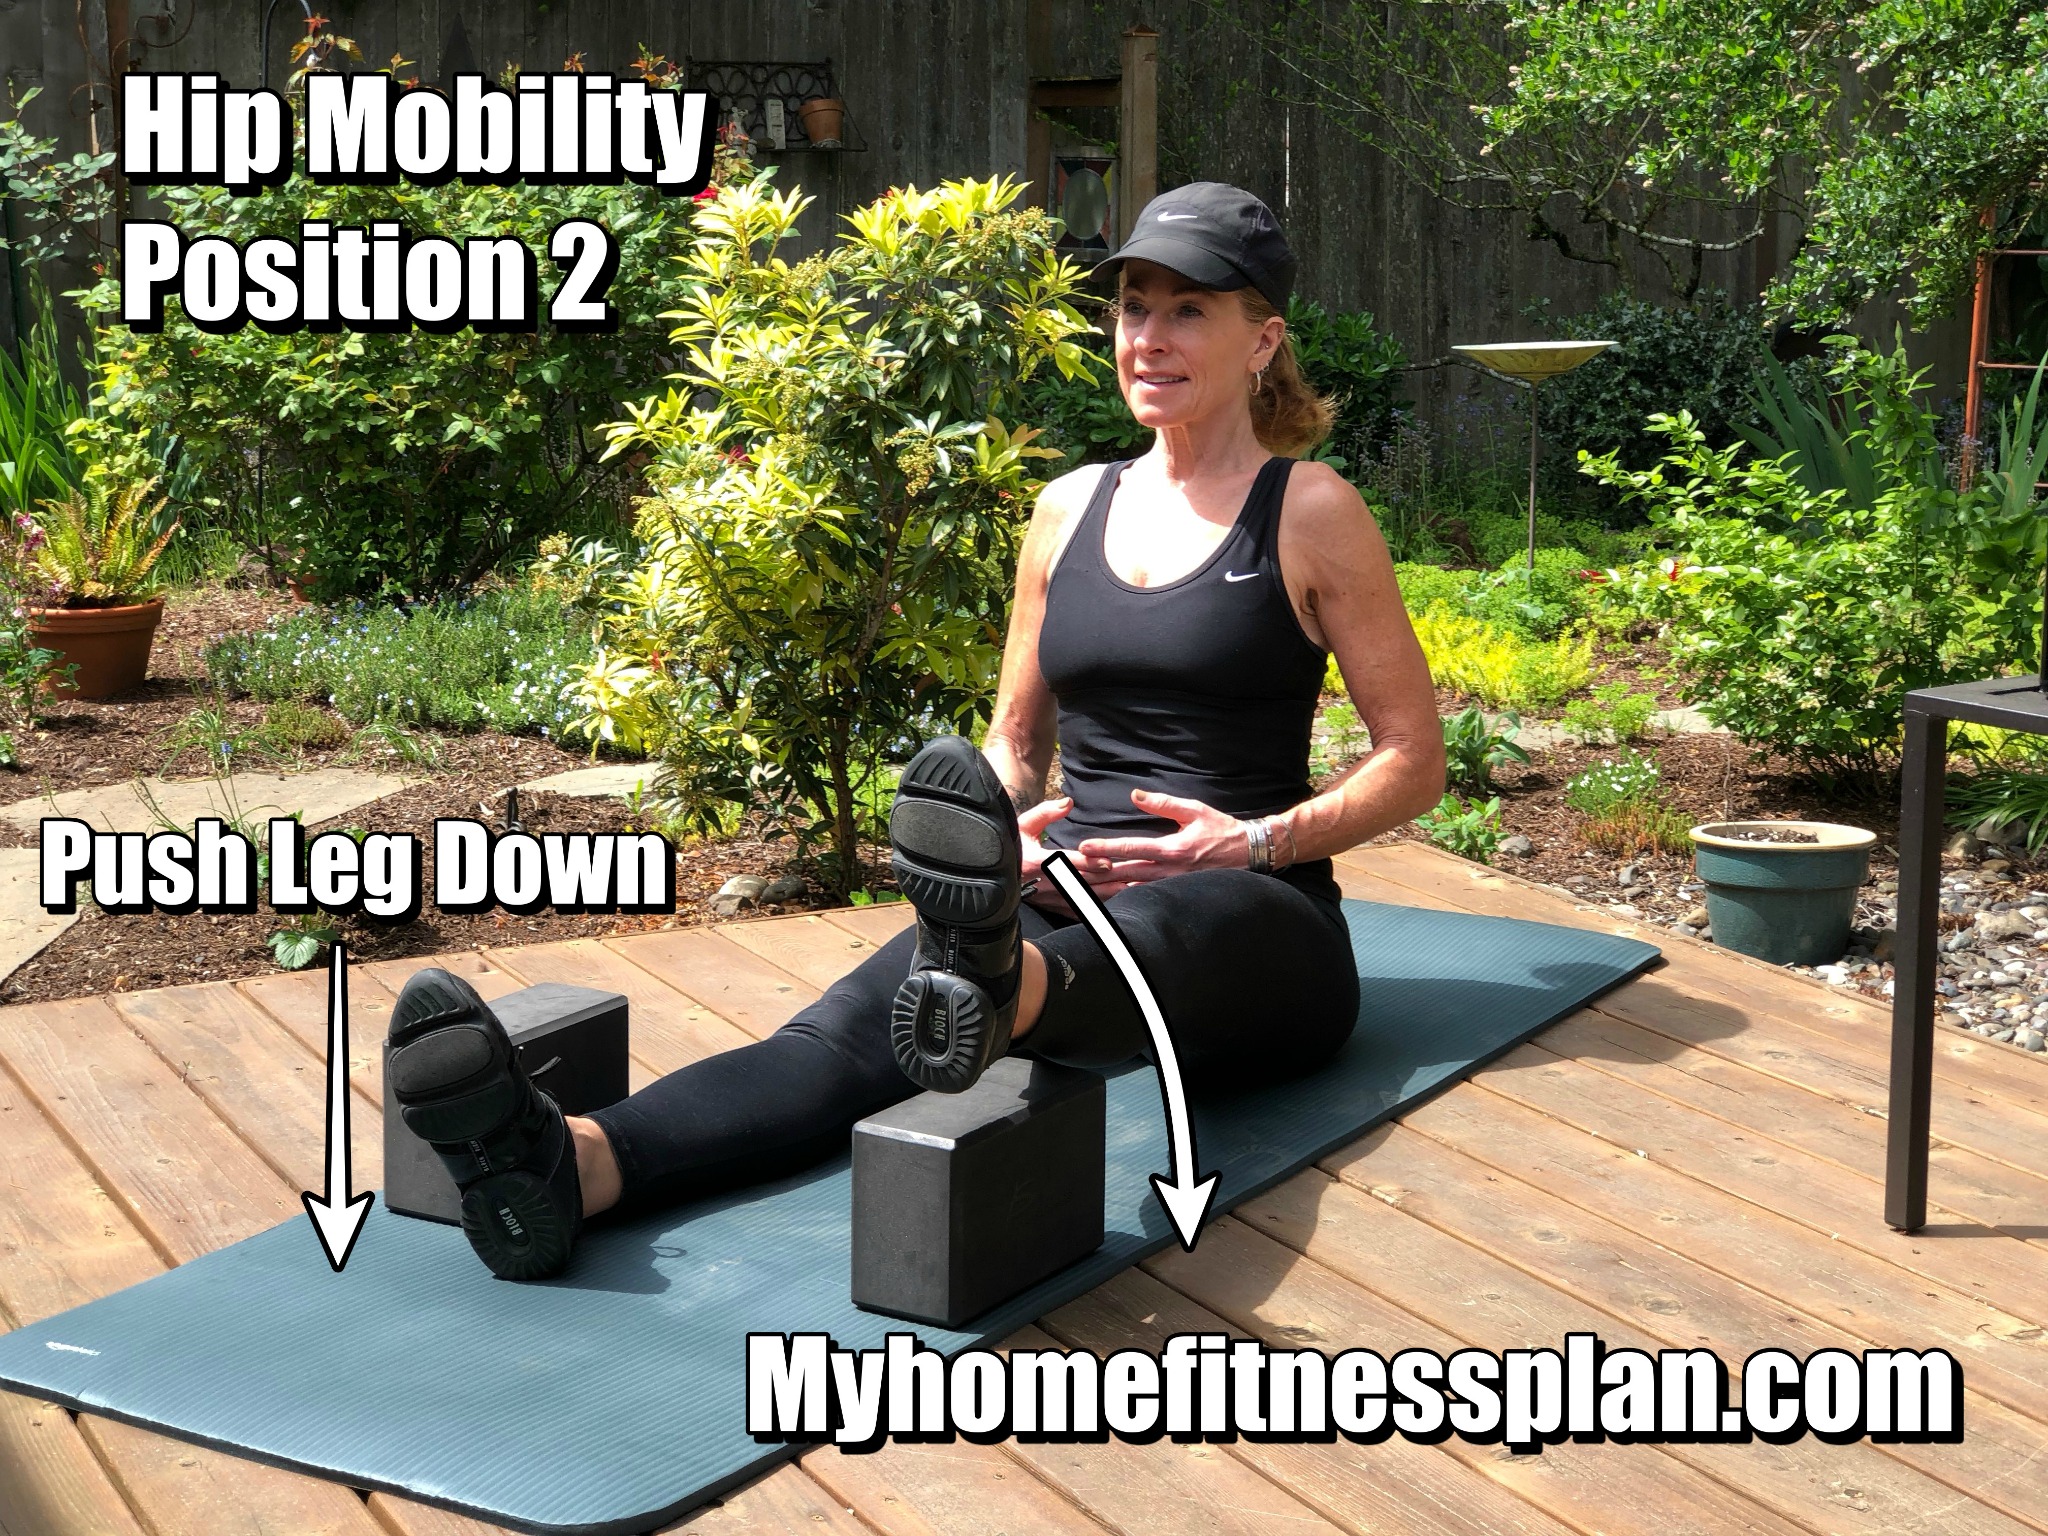
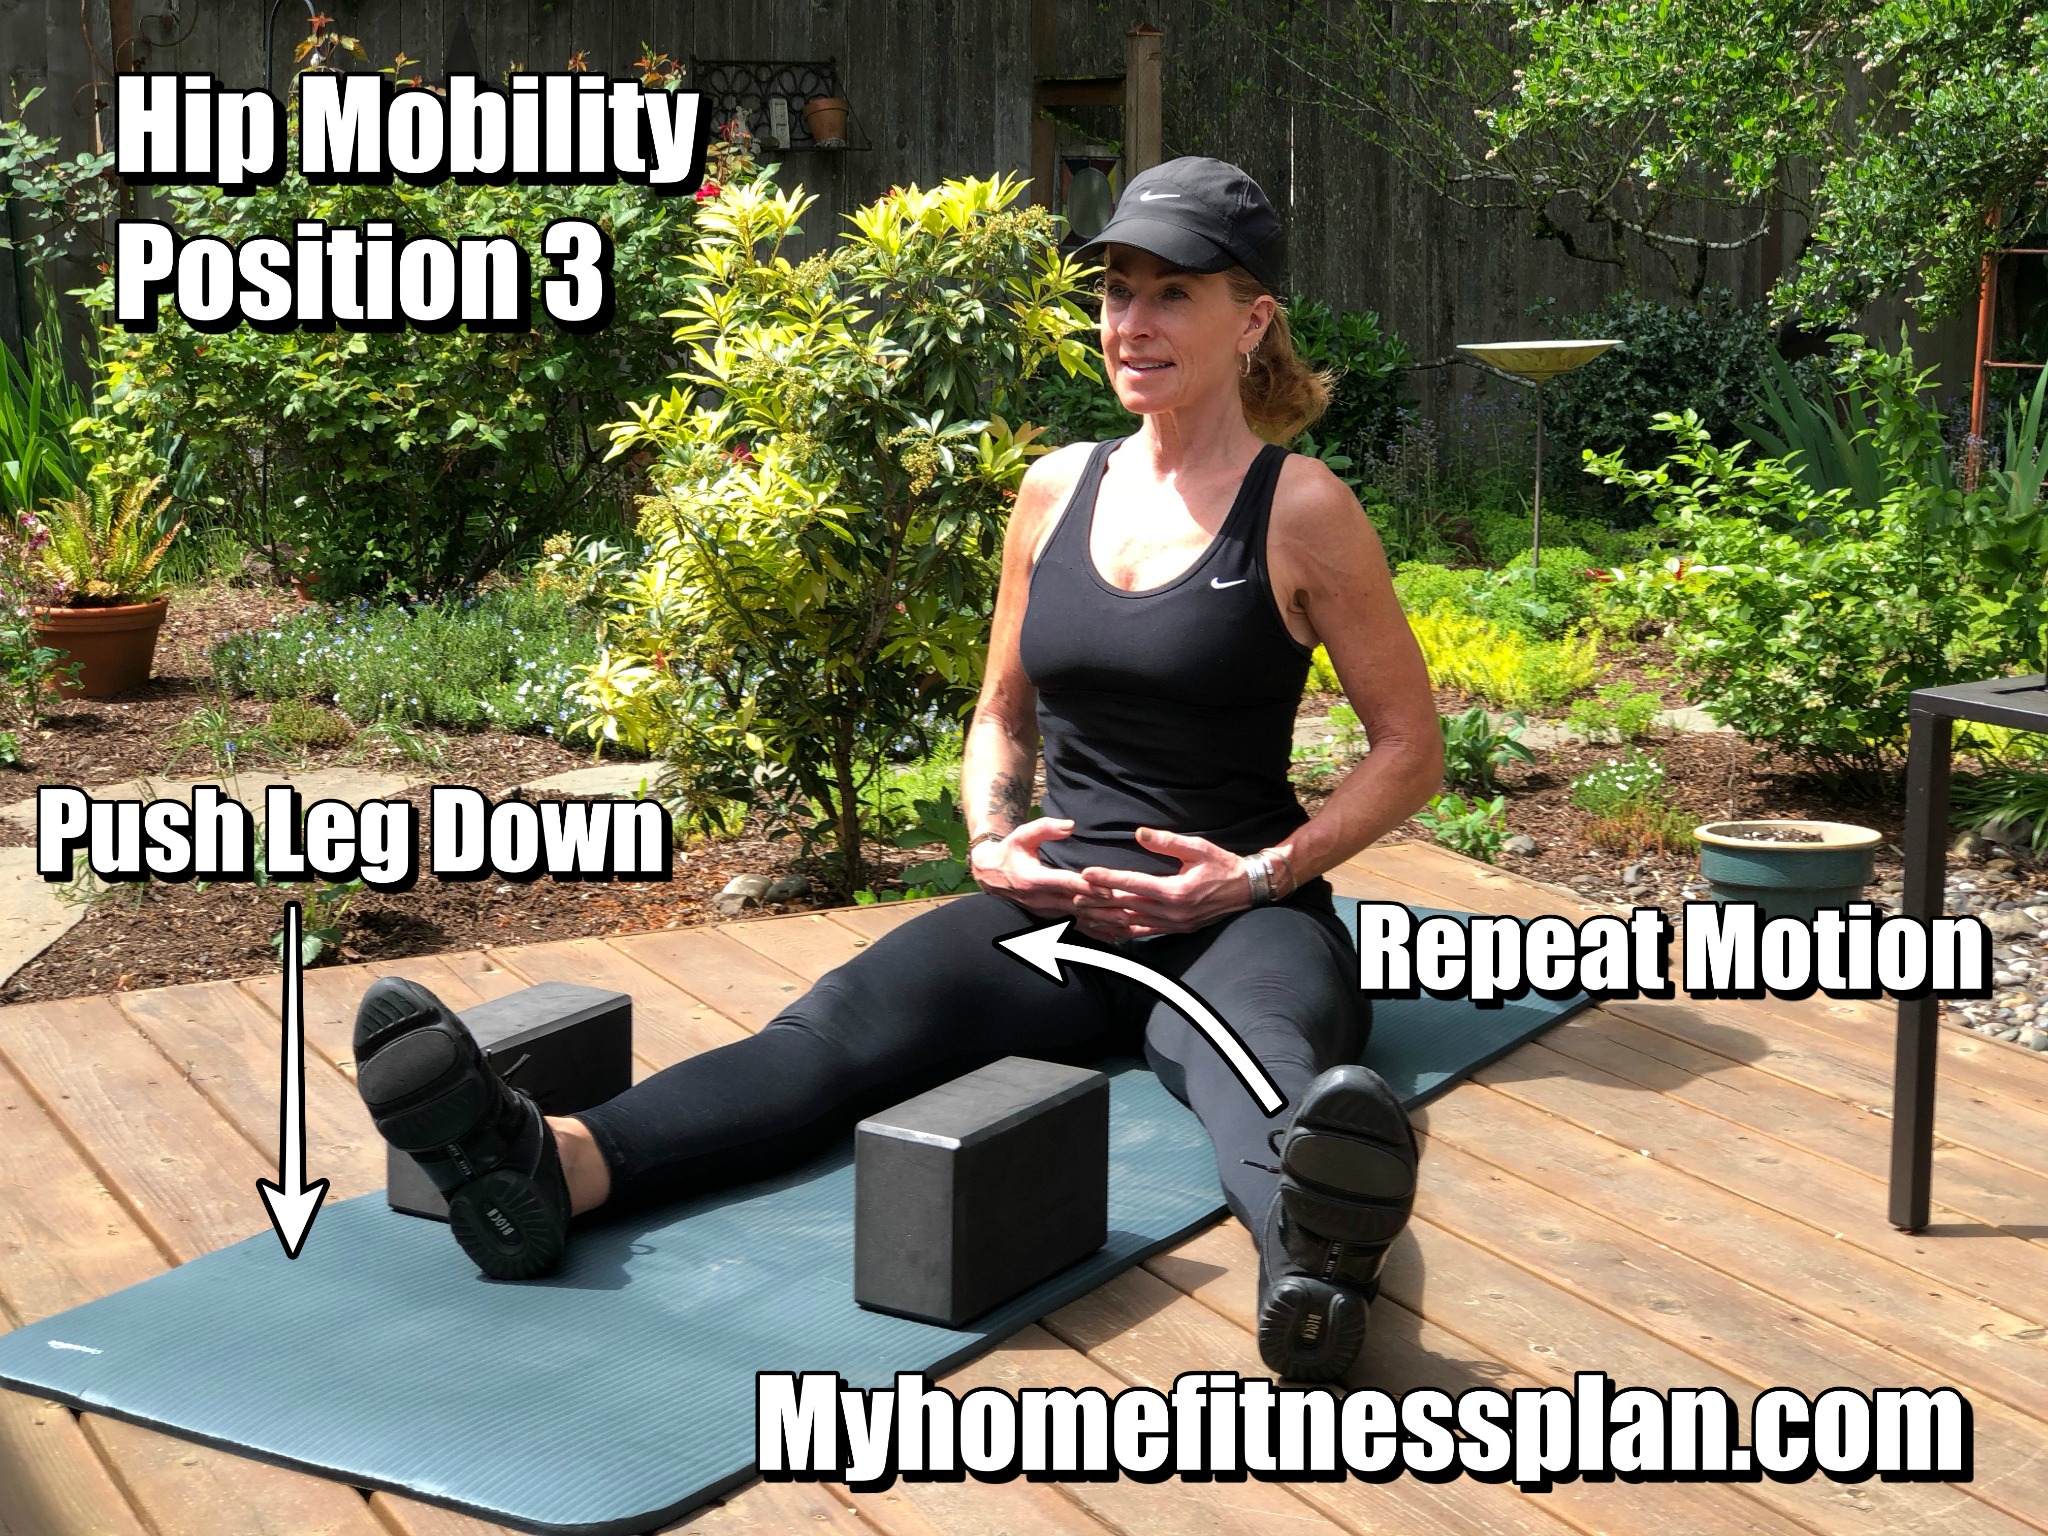
Equipment required- Yoga mat and two yoga blocks.
**Important note** Even though you may be using a yoga mat and blocks, this is NOT yoga, though this exercise and other active stretching will benefit your yoga practice.
Benefits- Strengthen the quadriceps, learn how to breathe and contract your muscles simultaneously, improve joint health and develop active mobility at the hip joint. It's important to maintain the greatest range of motion as possible in order to walk, run, bend down, pick up your kids...all of the movements that we take for granted and do unconsciously on a daily basis.
How to perform-
- Sit comfortably on the yoga mat with both legs out in front of you. Maintain upright posture.
- Arms may be bent at 90 degrees with hands in lap or make a fist with elbows at your side.
- For best results, create tension within the muscles while performing this exercise. This includes your legs, abdominals and upper body. Keep your neck (throat) and face relaxed.
- If starting with your left leg first (lifting over the block), focus on pushing your right leg into the ground the entire time the left leg is performing the movement. Do the same when switching to the other side.
Modification: Lean back on your hands if needed. Take deep breaths into your abdomen (NO shallow chest breathing). Working muscles need oxygen. Breathe...all the time.
Number of repetitions- 3 to 5 per leg. One leg at a time. The key to this exercise is to move very slowly as you lift your leg up and over the block. How slow? Aim for a minimum of 10 seconds and maximum of 20 seconds to lift your heel up and over the block, then back to the starting position. This equals one repetition. This may feel crazy challenging at first, but it is wicked awesome :)
Further Reading
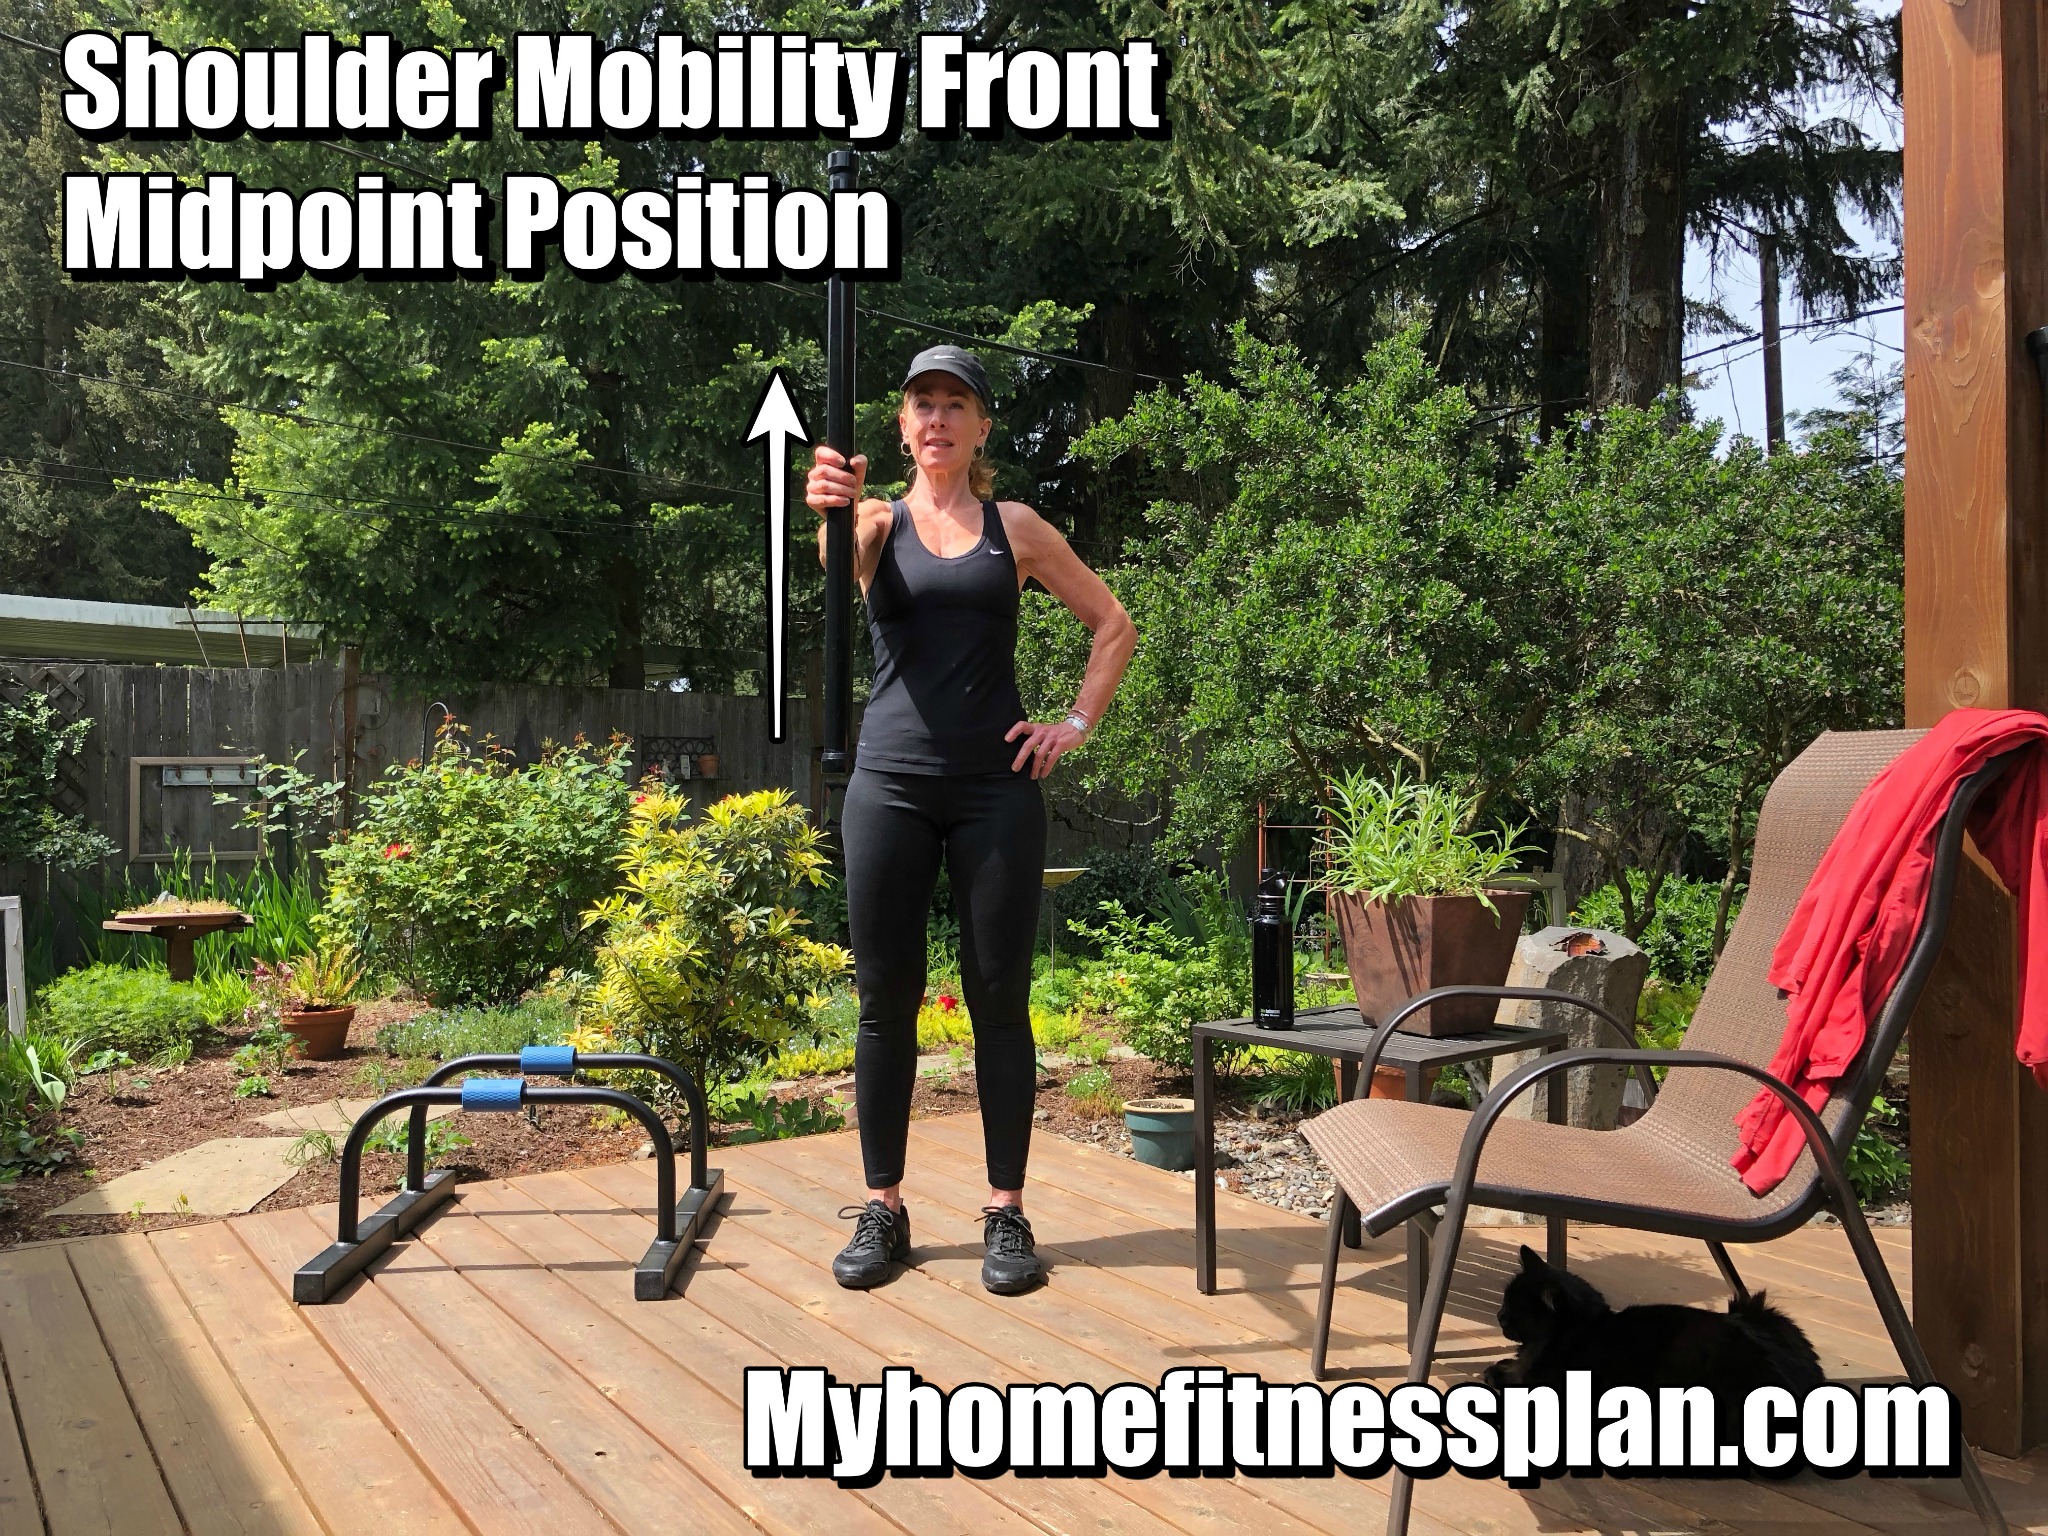
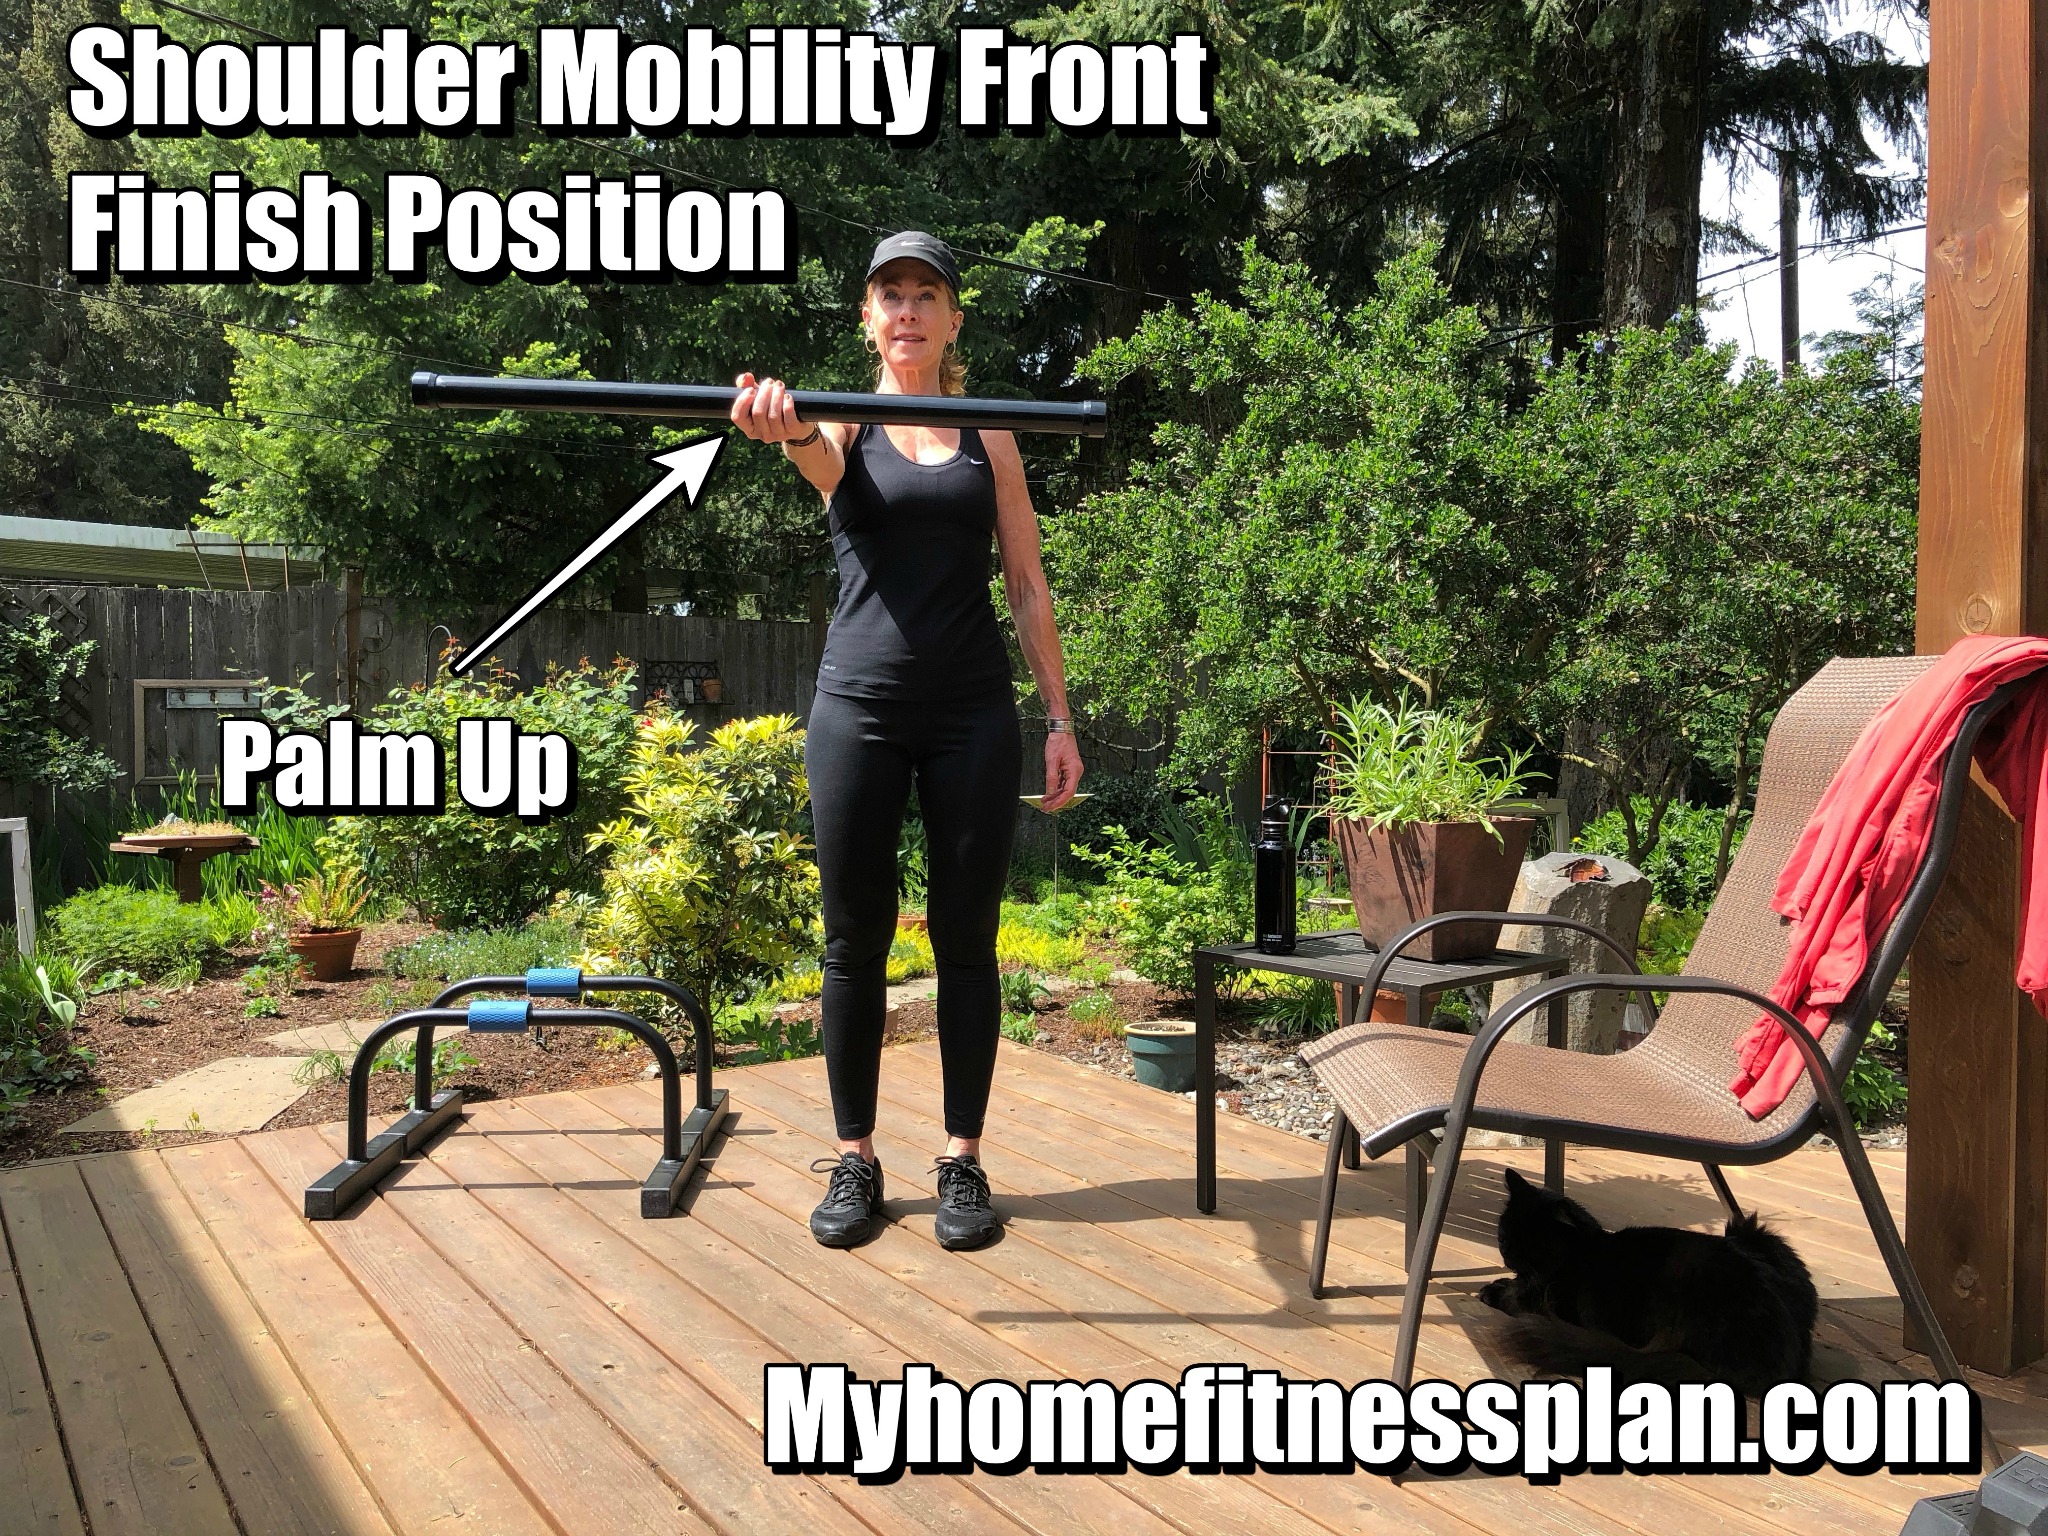
3. Shoulder Mobility- Front
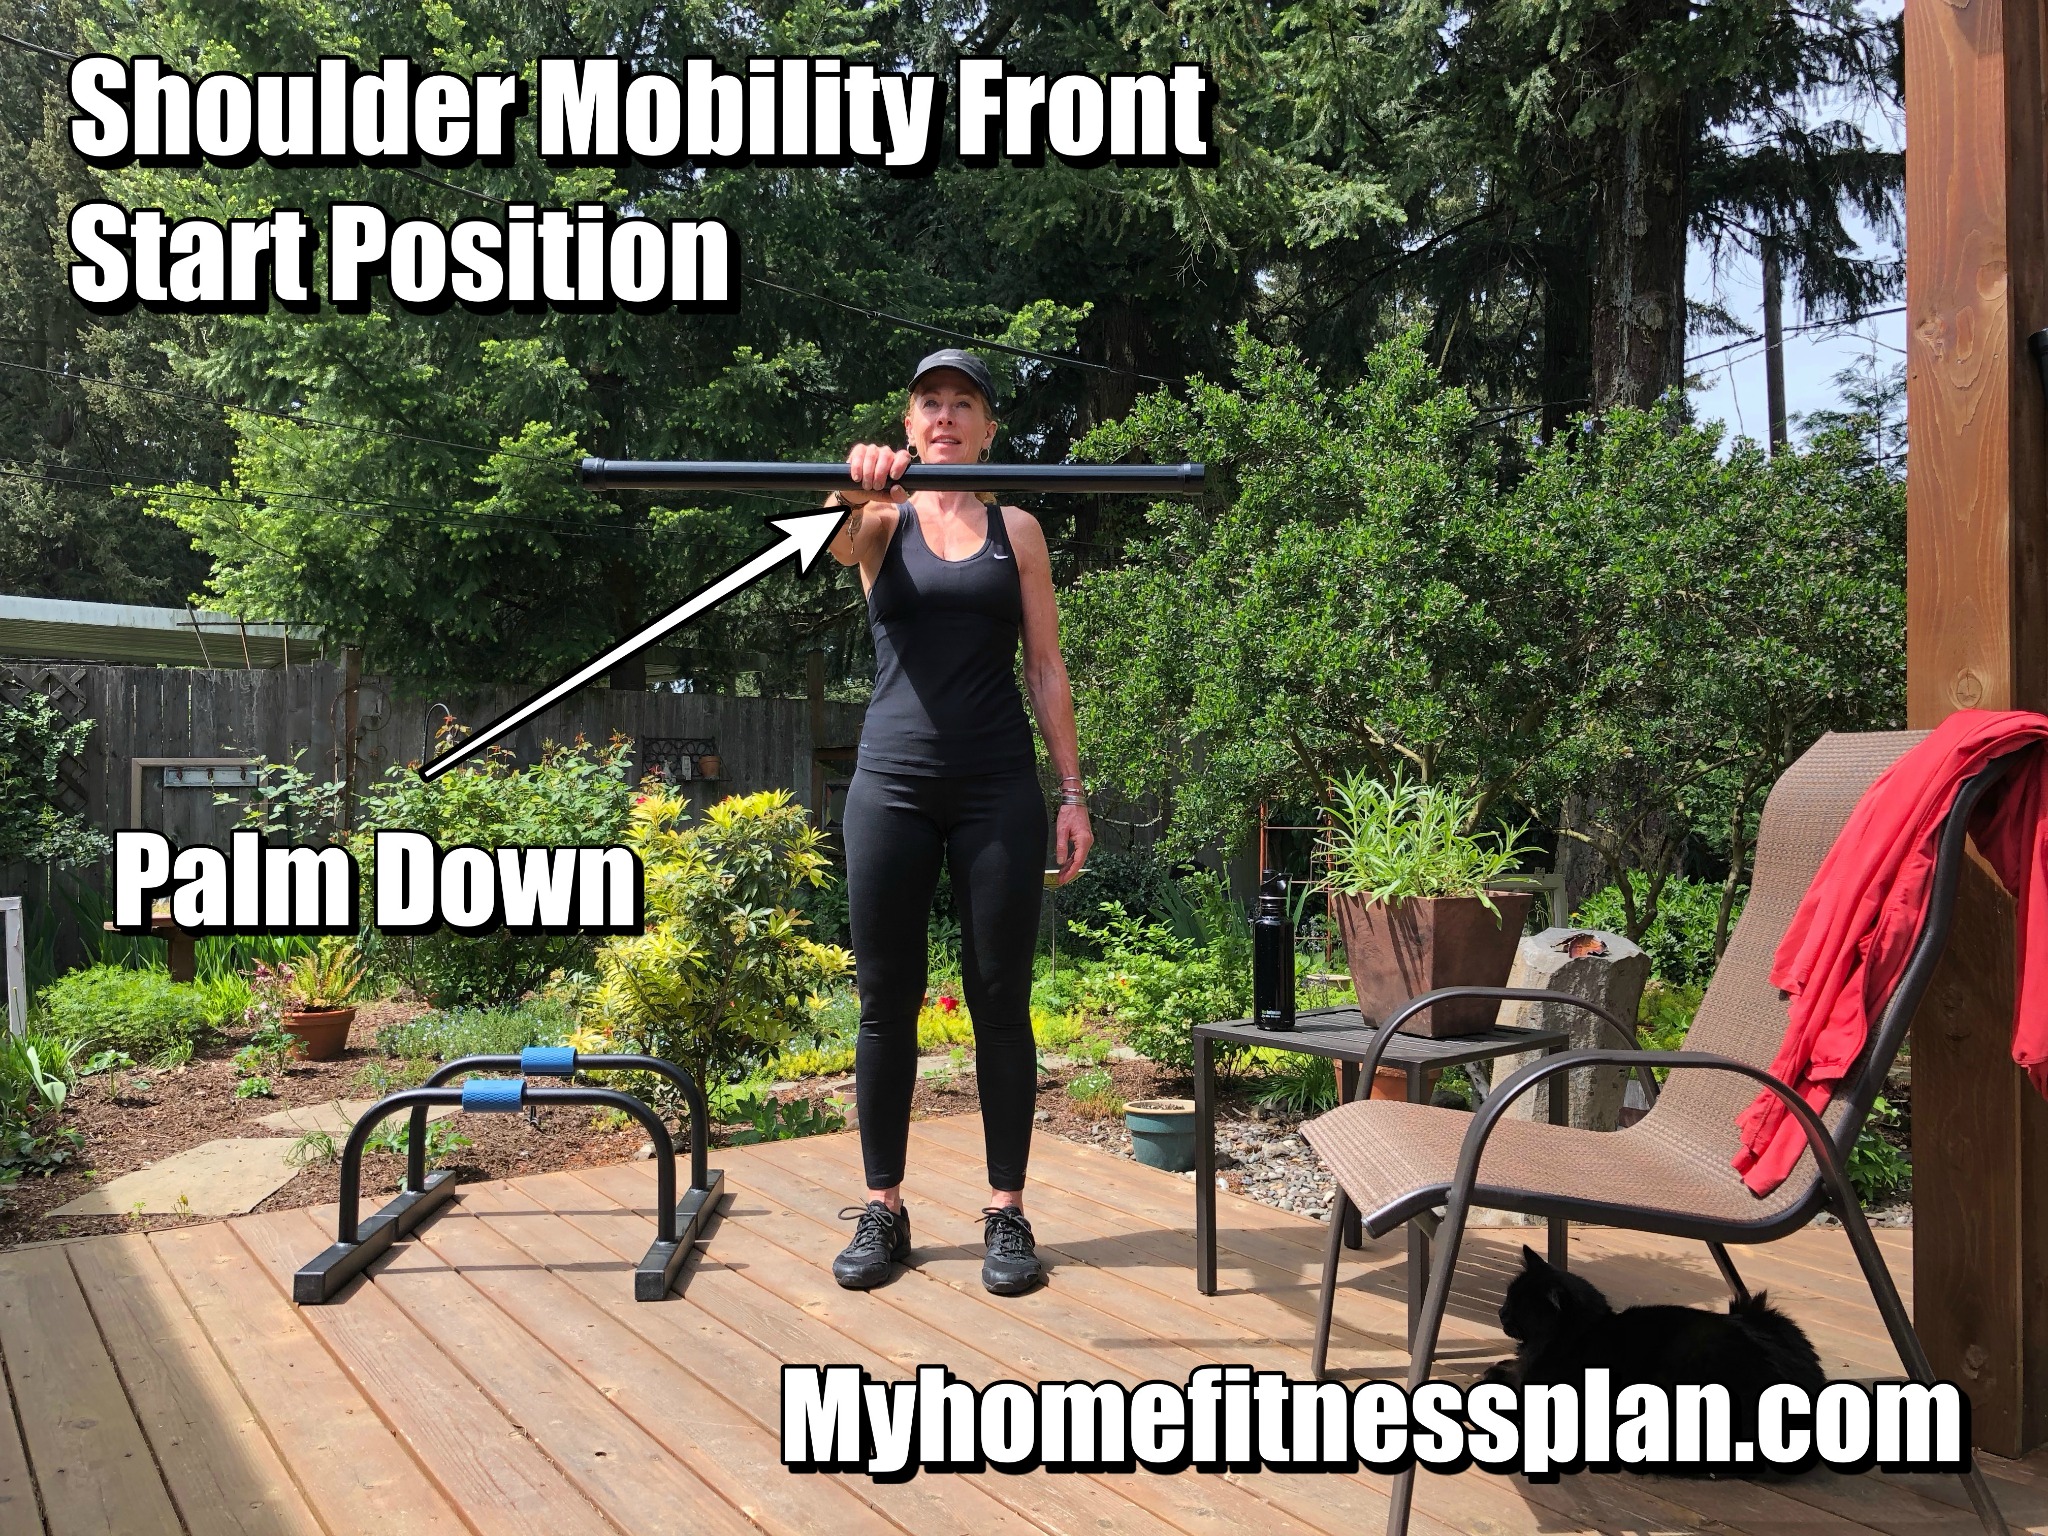
Equipment required- 3’ to 5’ long PVC or Dowel
Benefits- Strengthen the muscles of the shoulder complex and improve range of motion with the wrist. Your shoulders are involved in all types of daily activities - some conscious, others unconscious. Put yourself in the best position to reduce the chance of injury and have fun doing the things you love with stronger, more mobile joints.
How to perform-
- Begin by gripping the pvc or dowel in the middle (you can move your hand closer to either end to increase the challenge for your muscles).
- Extend your arm in front of you, palm facing the ground, away from your body.
- Maintain 90 degrees between your arm and the front of your body. It’s OK, if you are unable to reach 90 degrees, just do the best you can. Keep the non-working arm by your side.
- SLOWLY begin to rotate your palm toward the sky. Pause and rotate your palm back toward the ground. This is one repetition. Breathe...all the time.
Number of repetitions- 10 per arm.
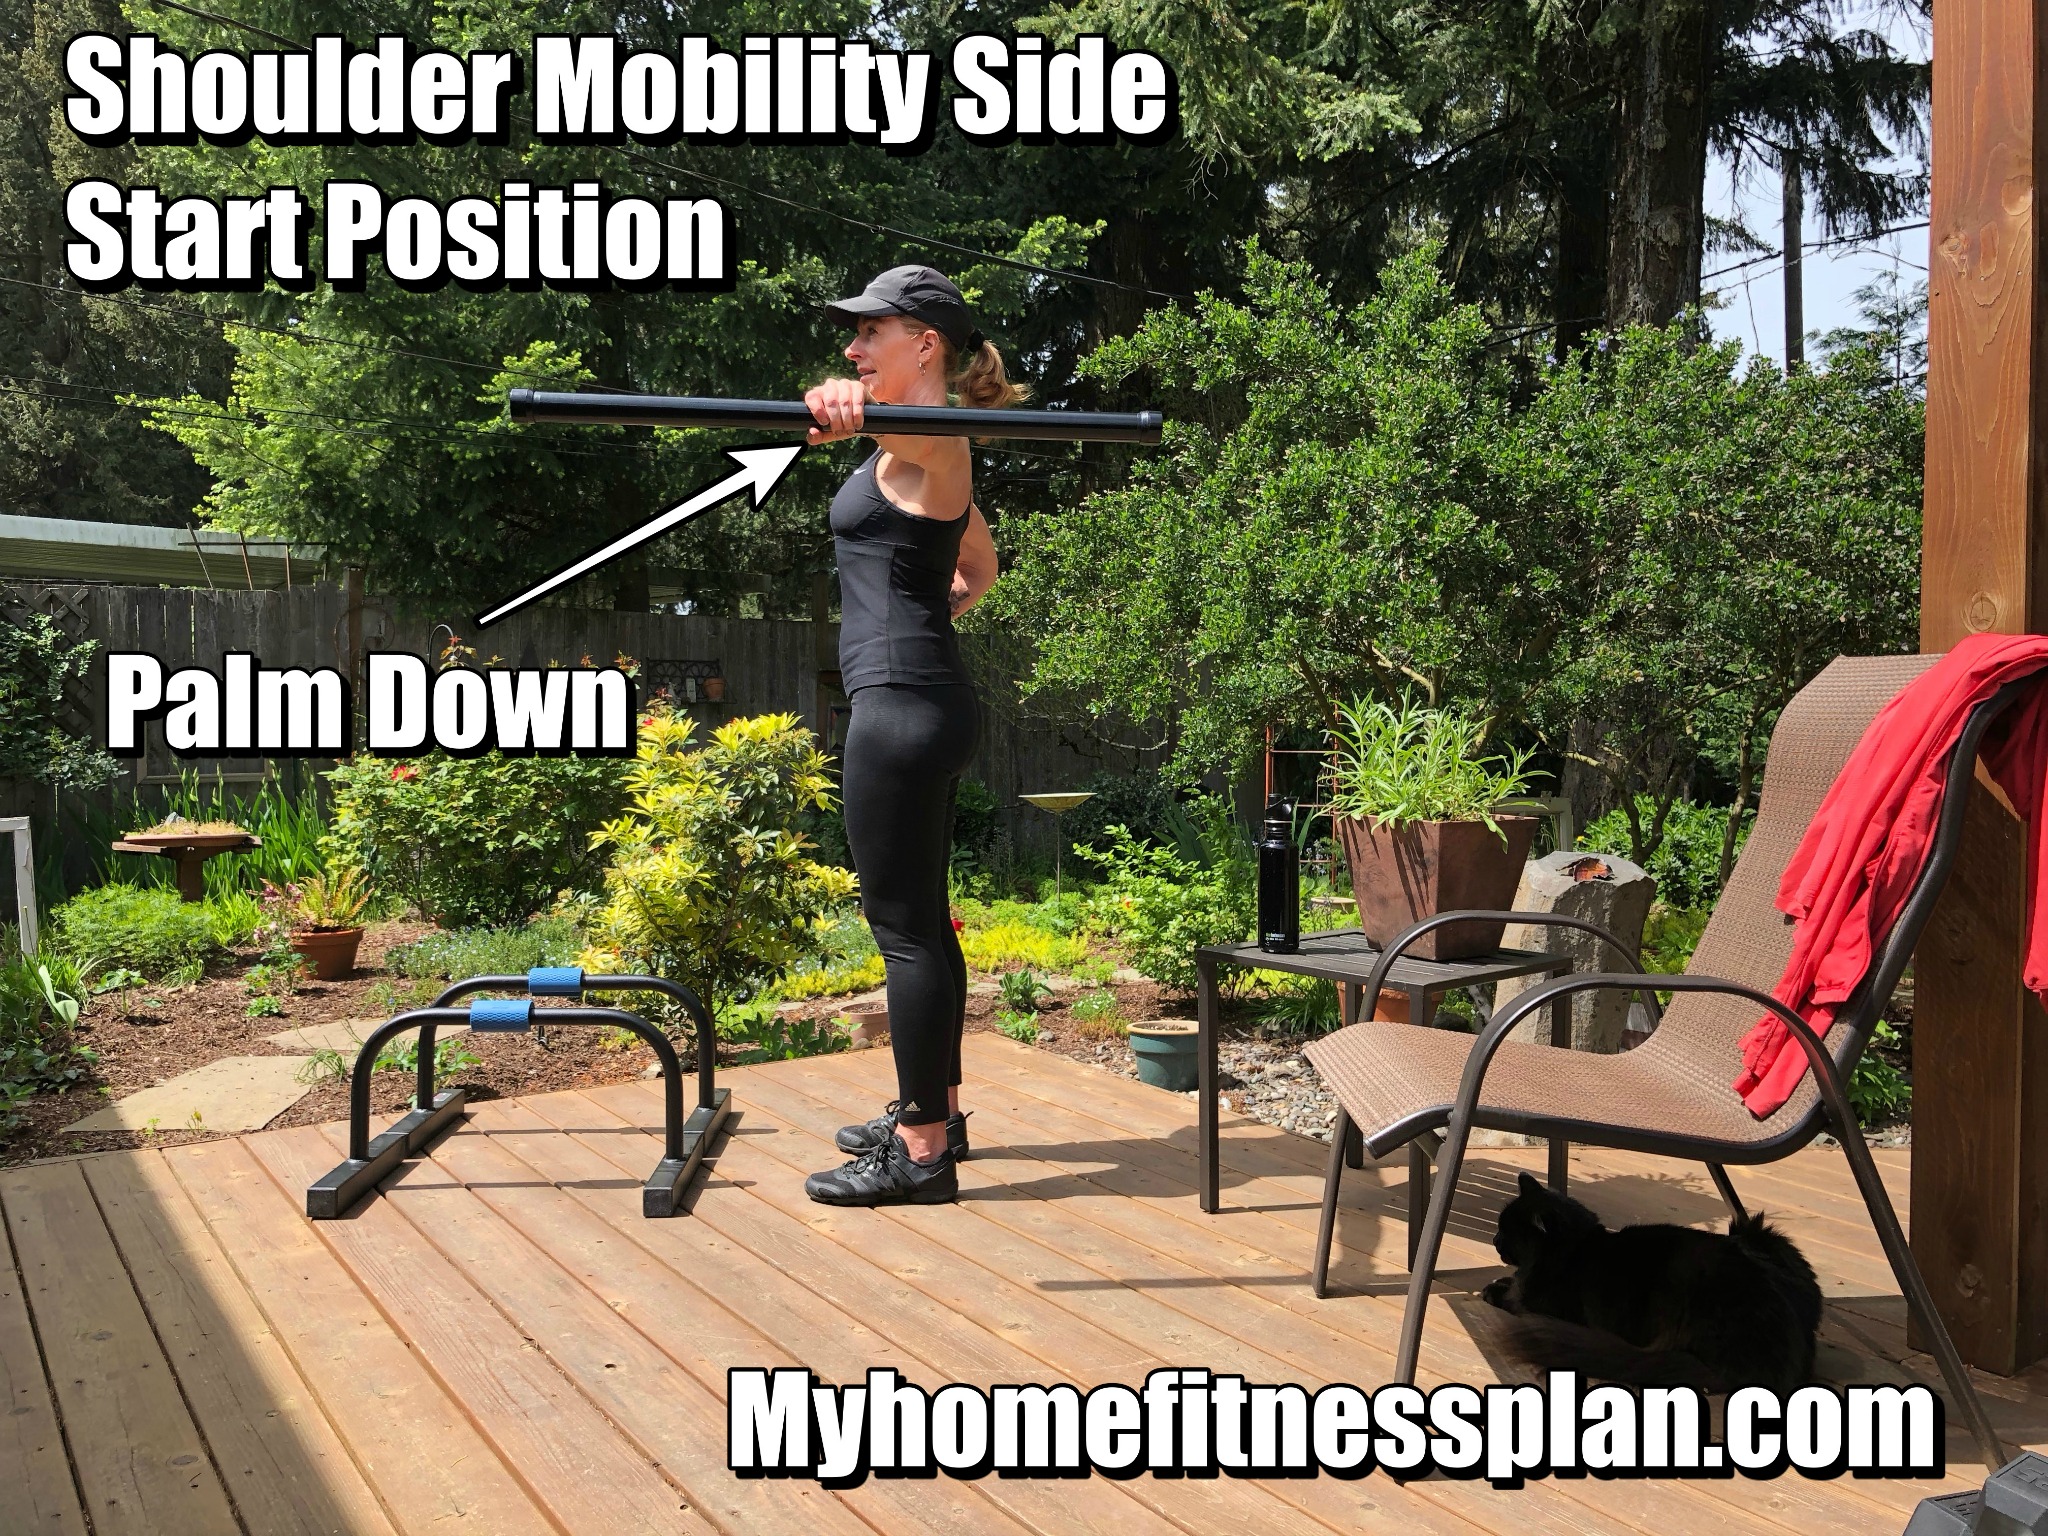
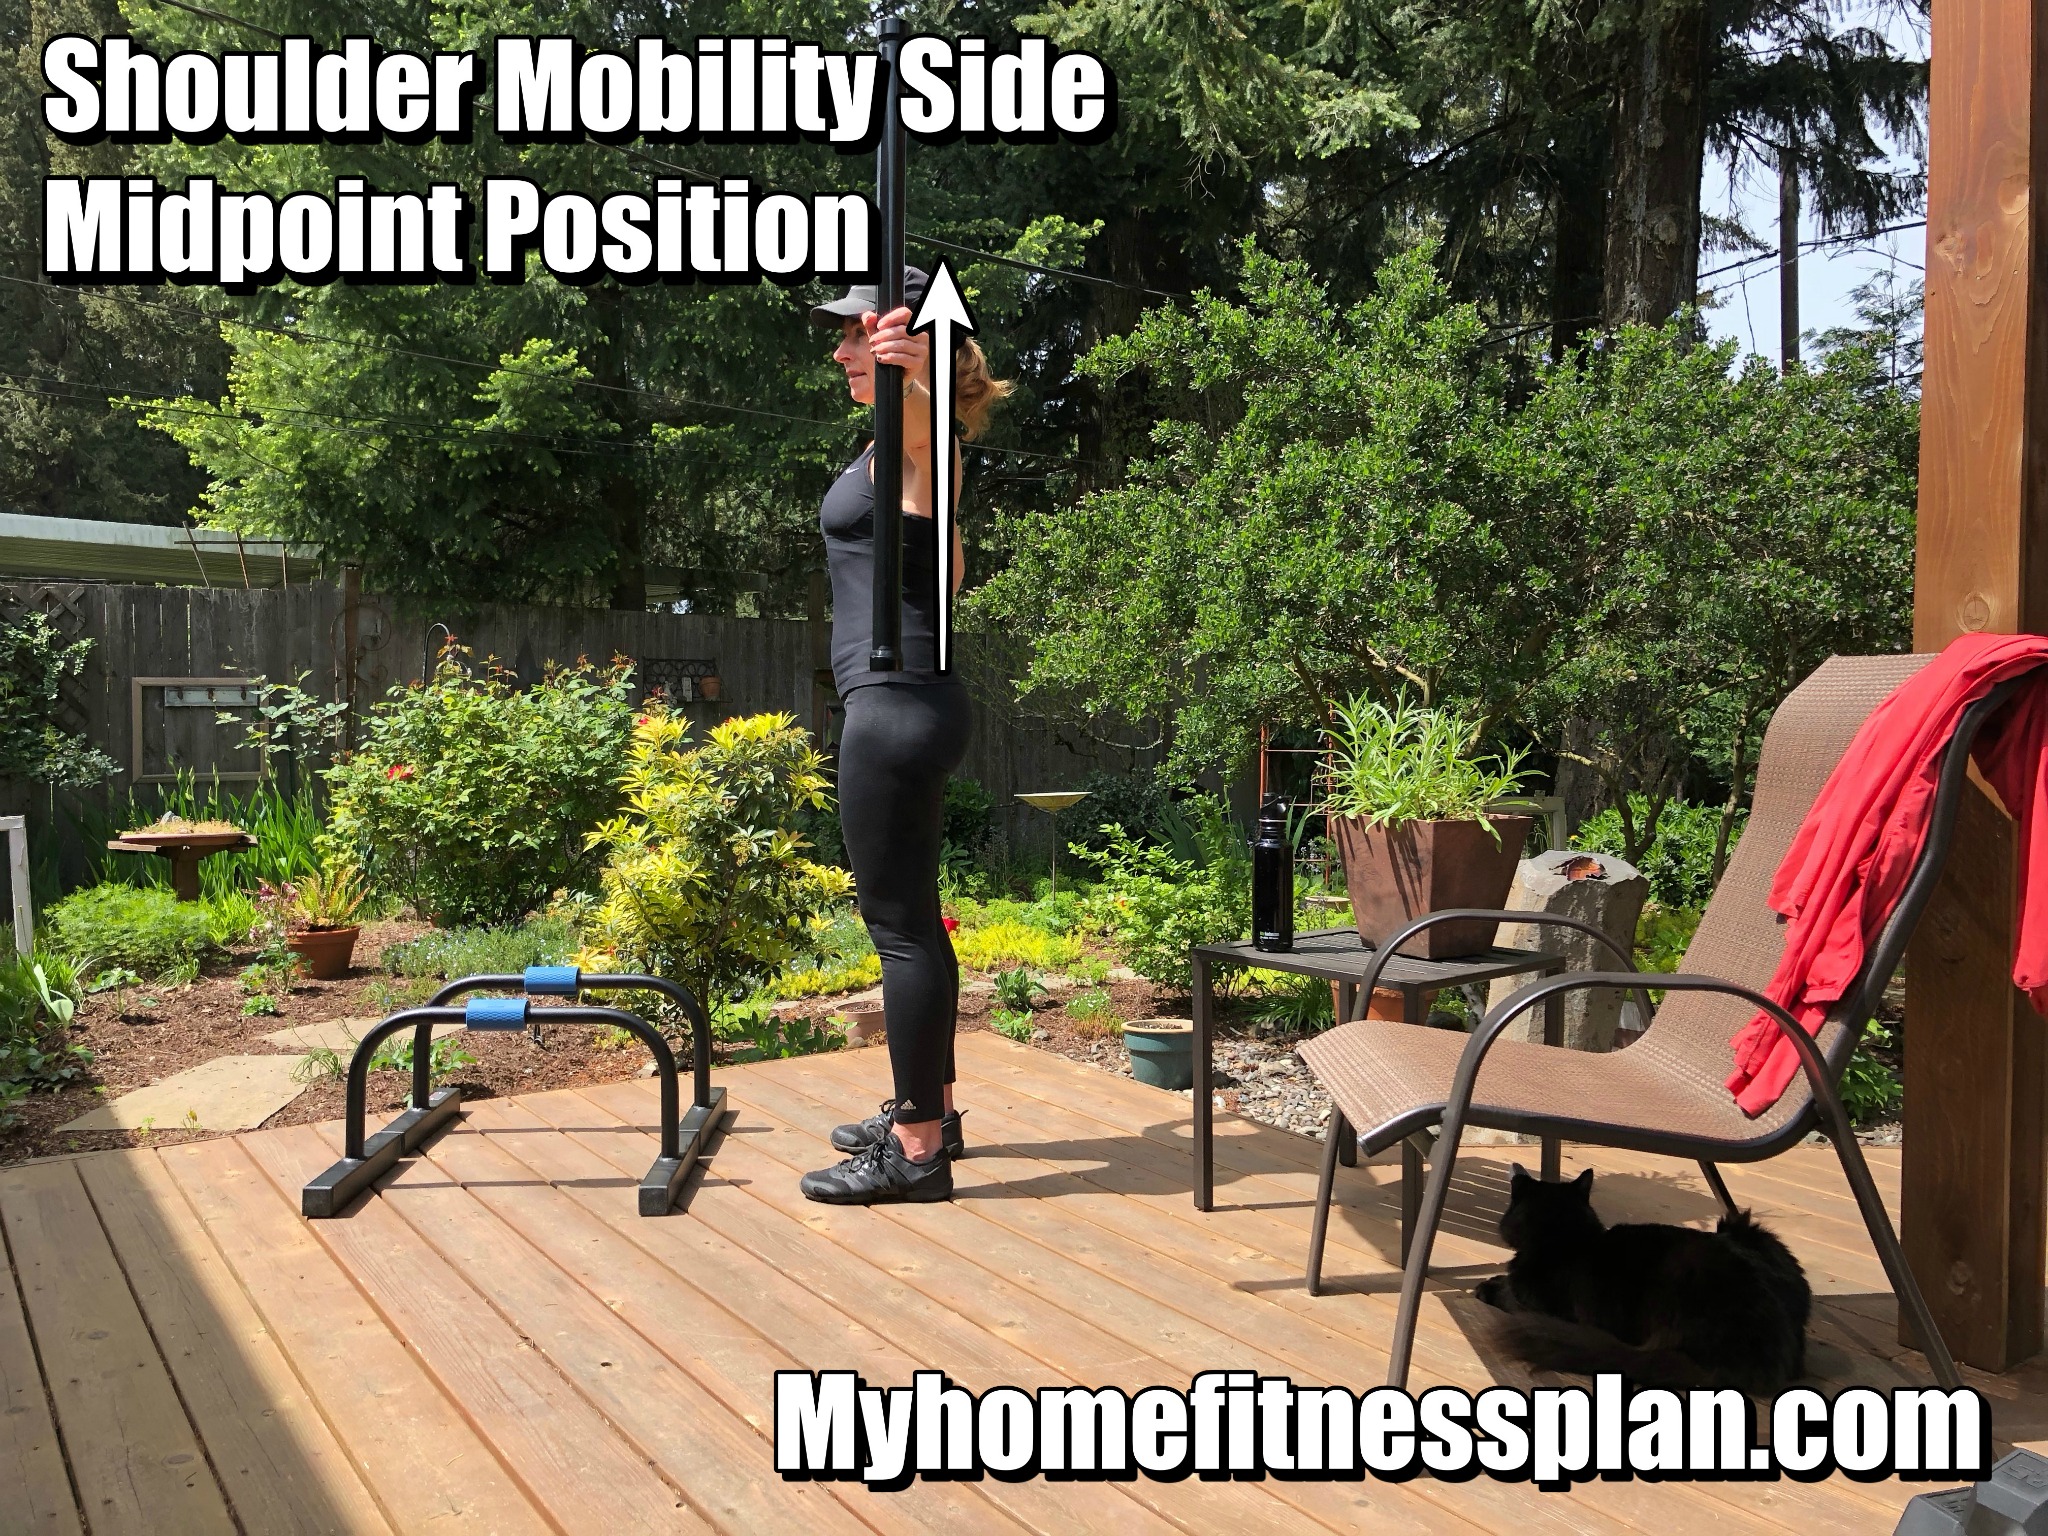
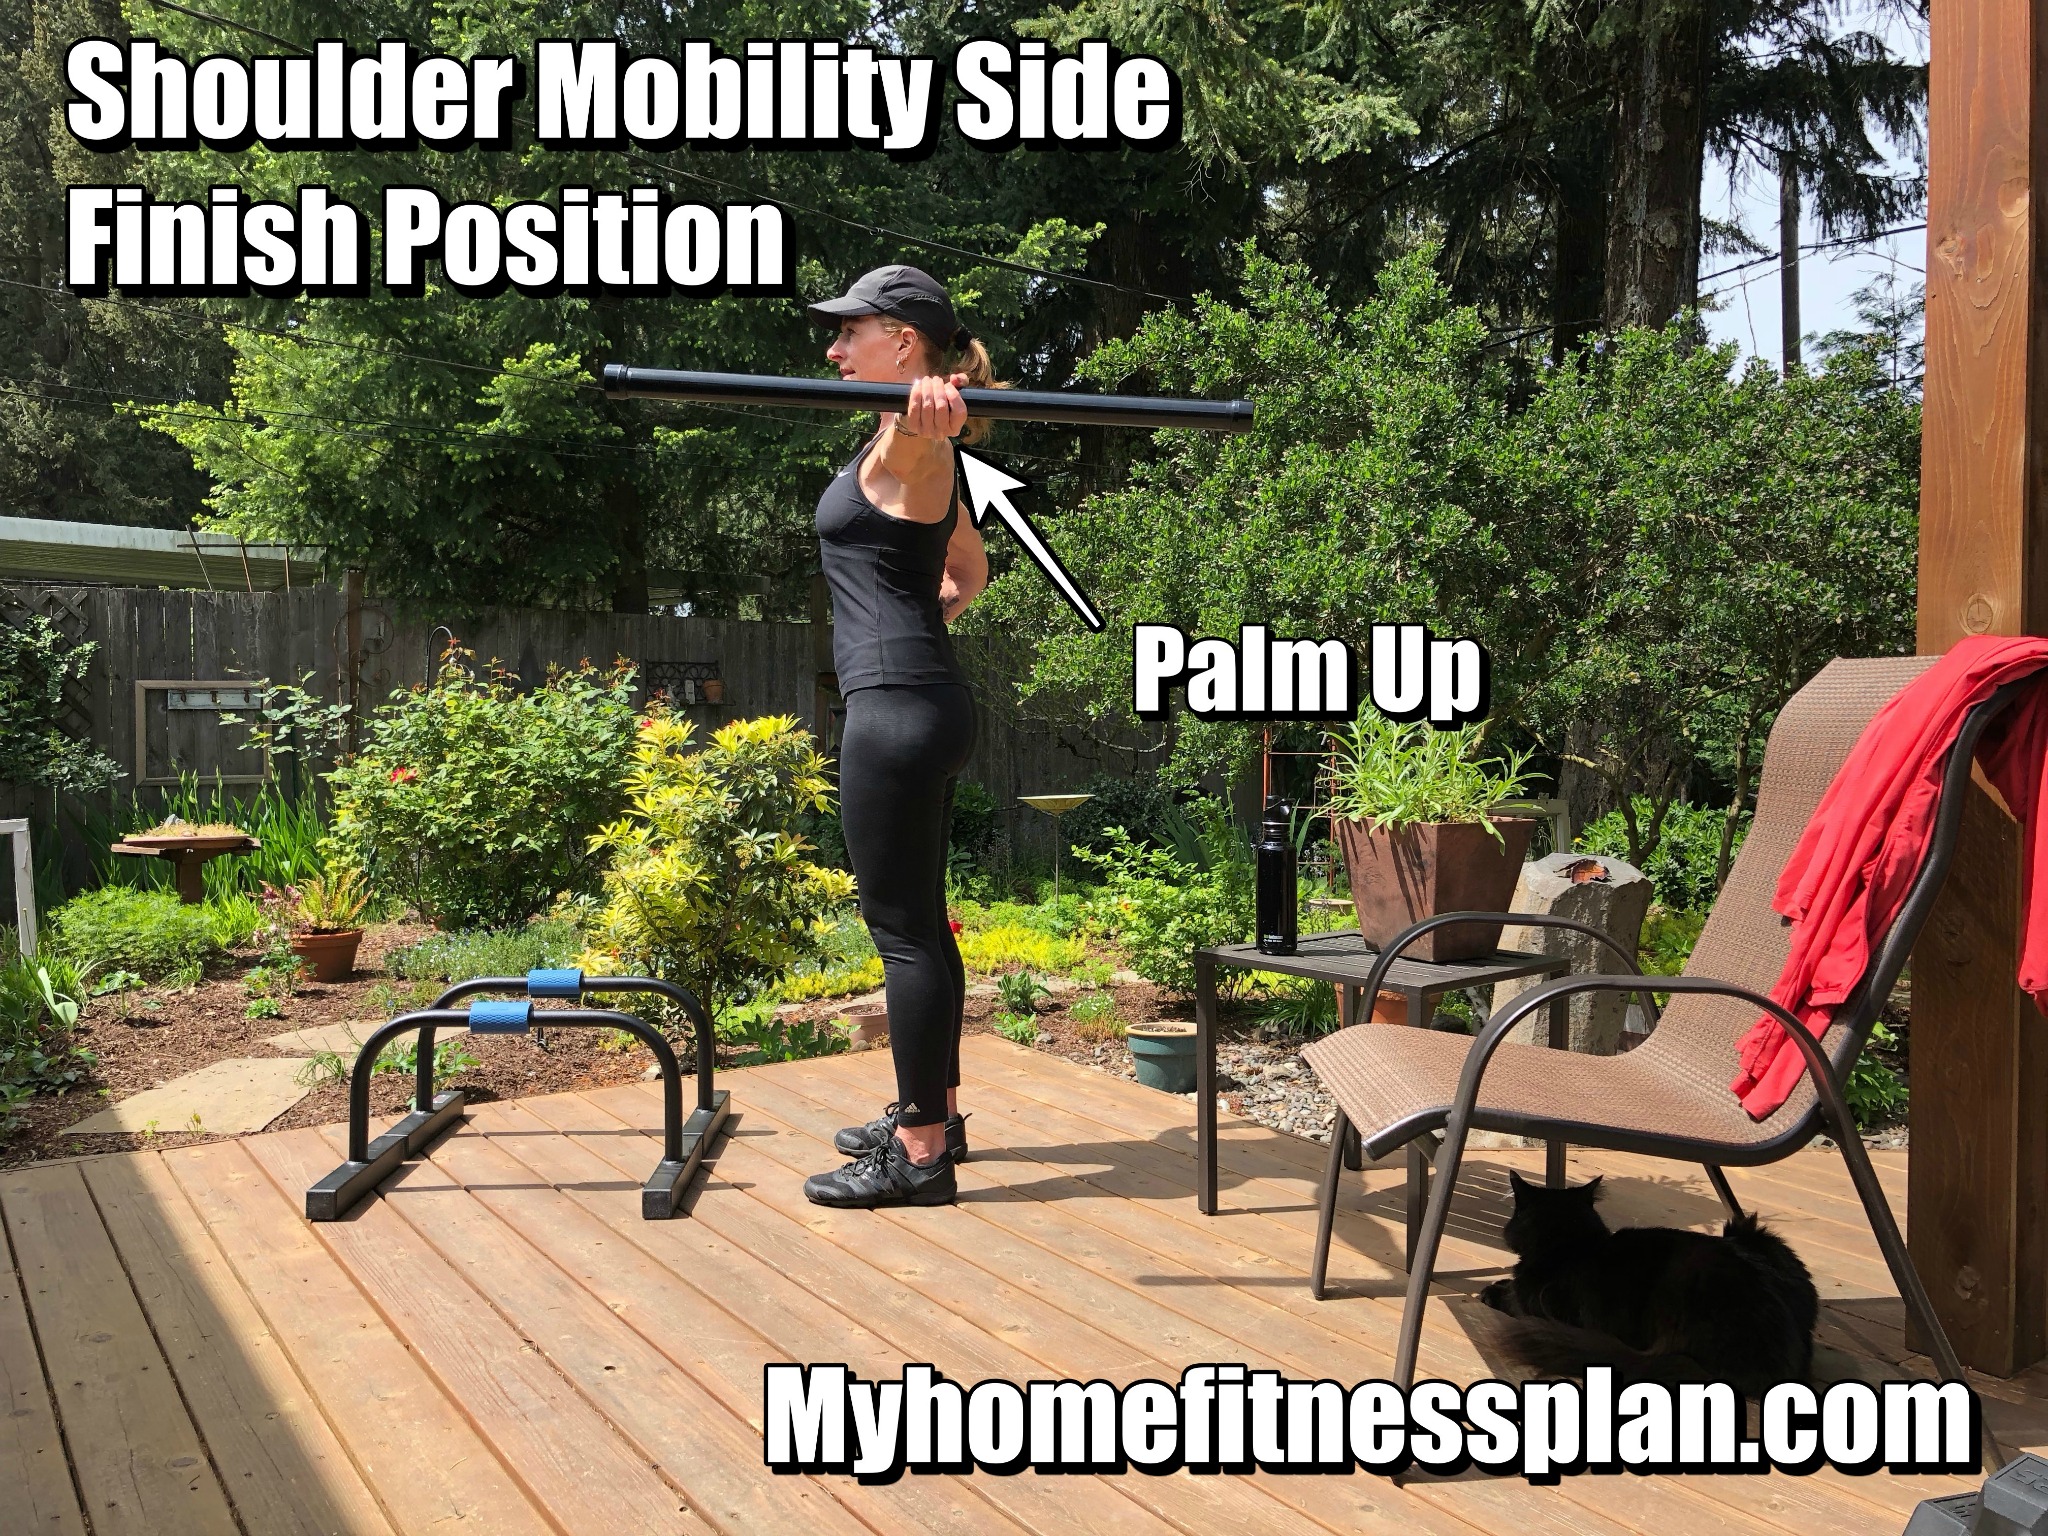
4. Shoulder Mobility- Side
Equipment required- 3’ to 5’ long PVC pipe or Dowel
Benefits- Strengthen the muscles of the shoulder complex and improve wrist range of motion.
How to perform-
- Begin by gripping the pvc or dowel in the middle (you can move your hand closer to either end to increase the challenge for your muscles).
- Extend your arm to the side, palm facing the ground, away from your body.
- Maintain 90 degrees between your arm and side. It’s OK if you are unable to reach 90 degrees, just do the best you can. Keep the non-working arm by your side.
- SLOWLY begin to rotate your palm toward the sky. Pause and rotate your palm back toward the ground. This is one repetition. Take deep breaths into your abdomen (NO shallow chest breathing). Working muscles need oxygen. Breathe...all the time.
Number of repetitions- 10 per arm
Fit tip- Improve your kinesthetic/proprioceptive awareness by not looking at your arm during the exercise.
Further Reading
5. Bicep Curl
Equipment required- Dumbbells (preferably two, but one will work)
Benefits- Strengthen the grip and bicep muscle. Grip strength is very important to overall health.
How to perform-
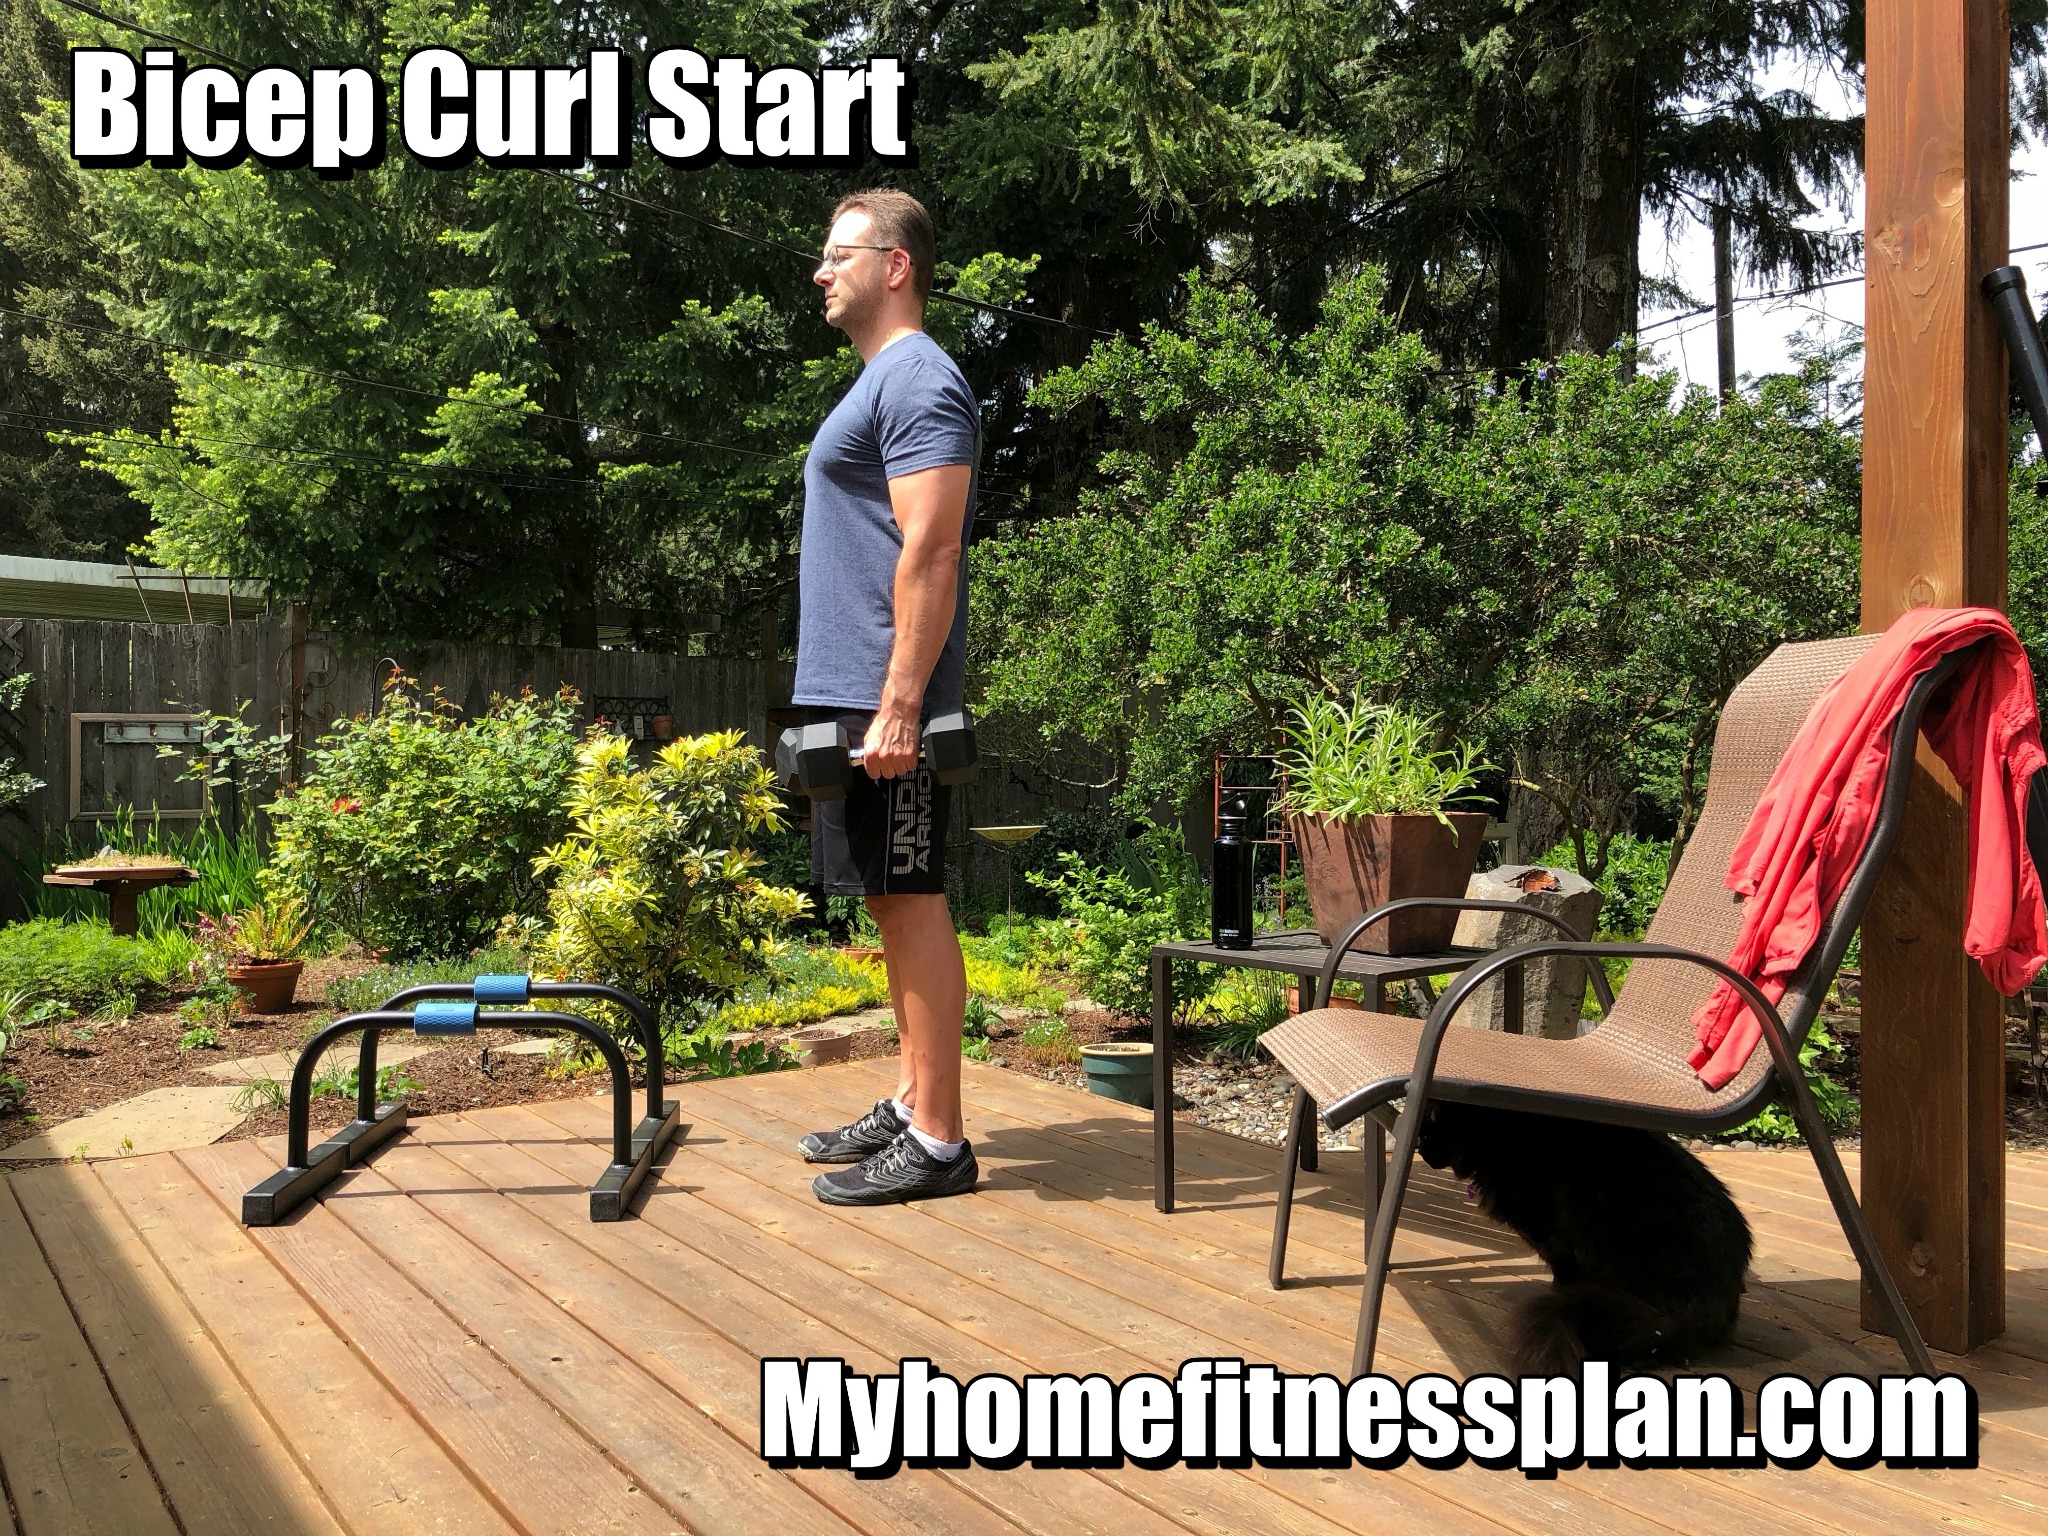
- Stand tall. Focus on pushing your feet into the ground. This will help to increase muscular tension in the lower part of the body, creating a stable base to perform the exercise.
- Have a very slight (10 degrees or less) bend in the knees. Maintain a firm grip (not a death grip) on the dumbbell(s). Your palms may be facing the side of your leg or straight ahead.
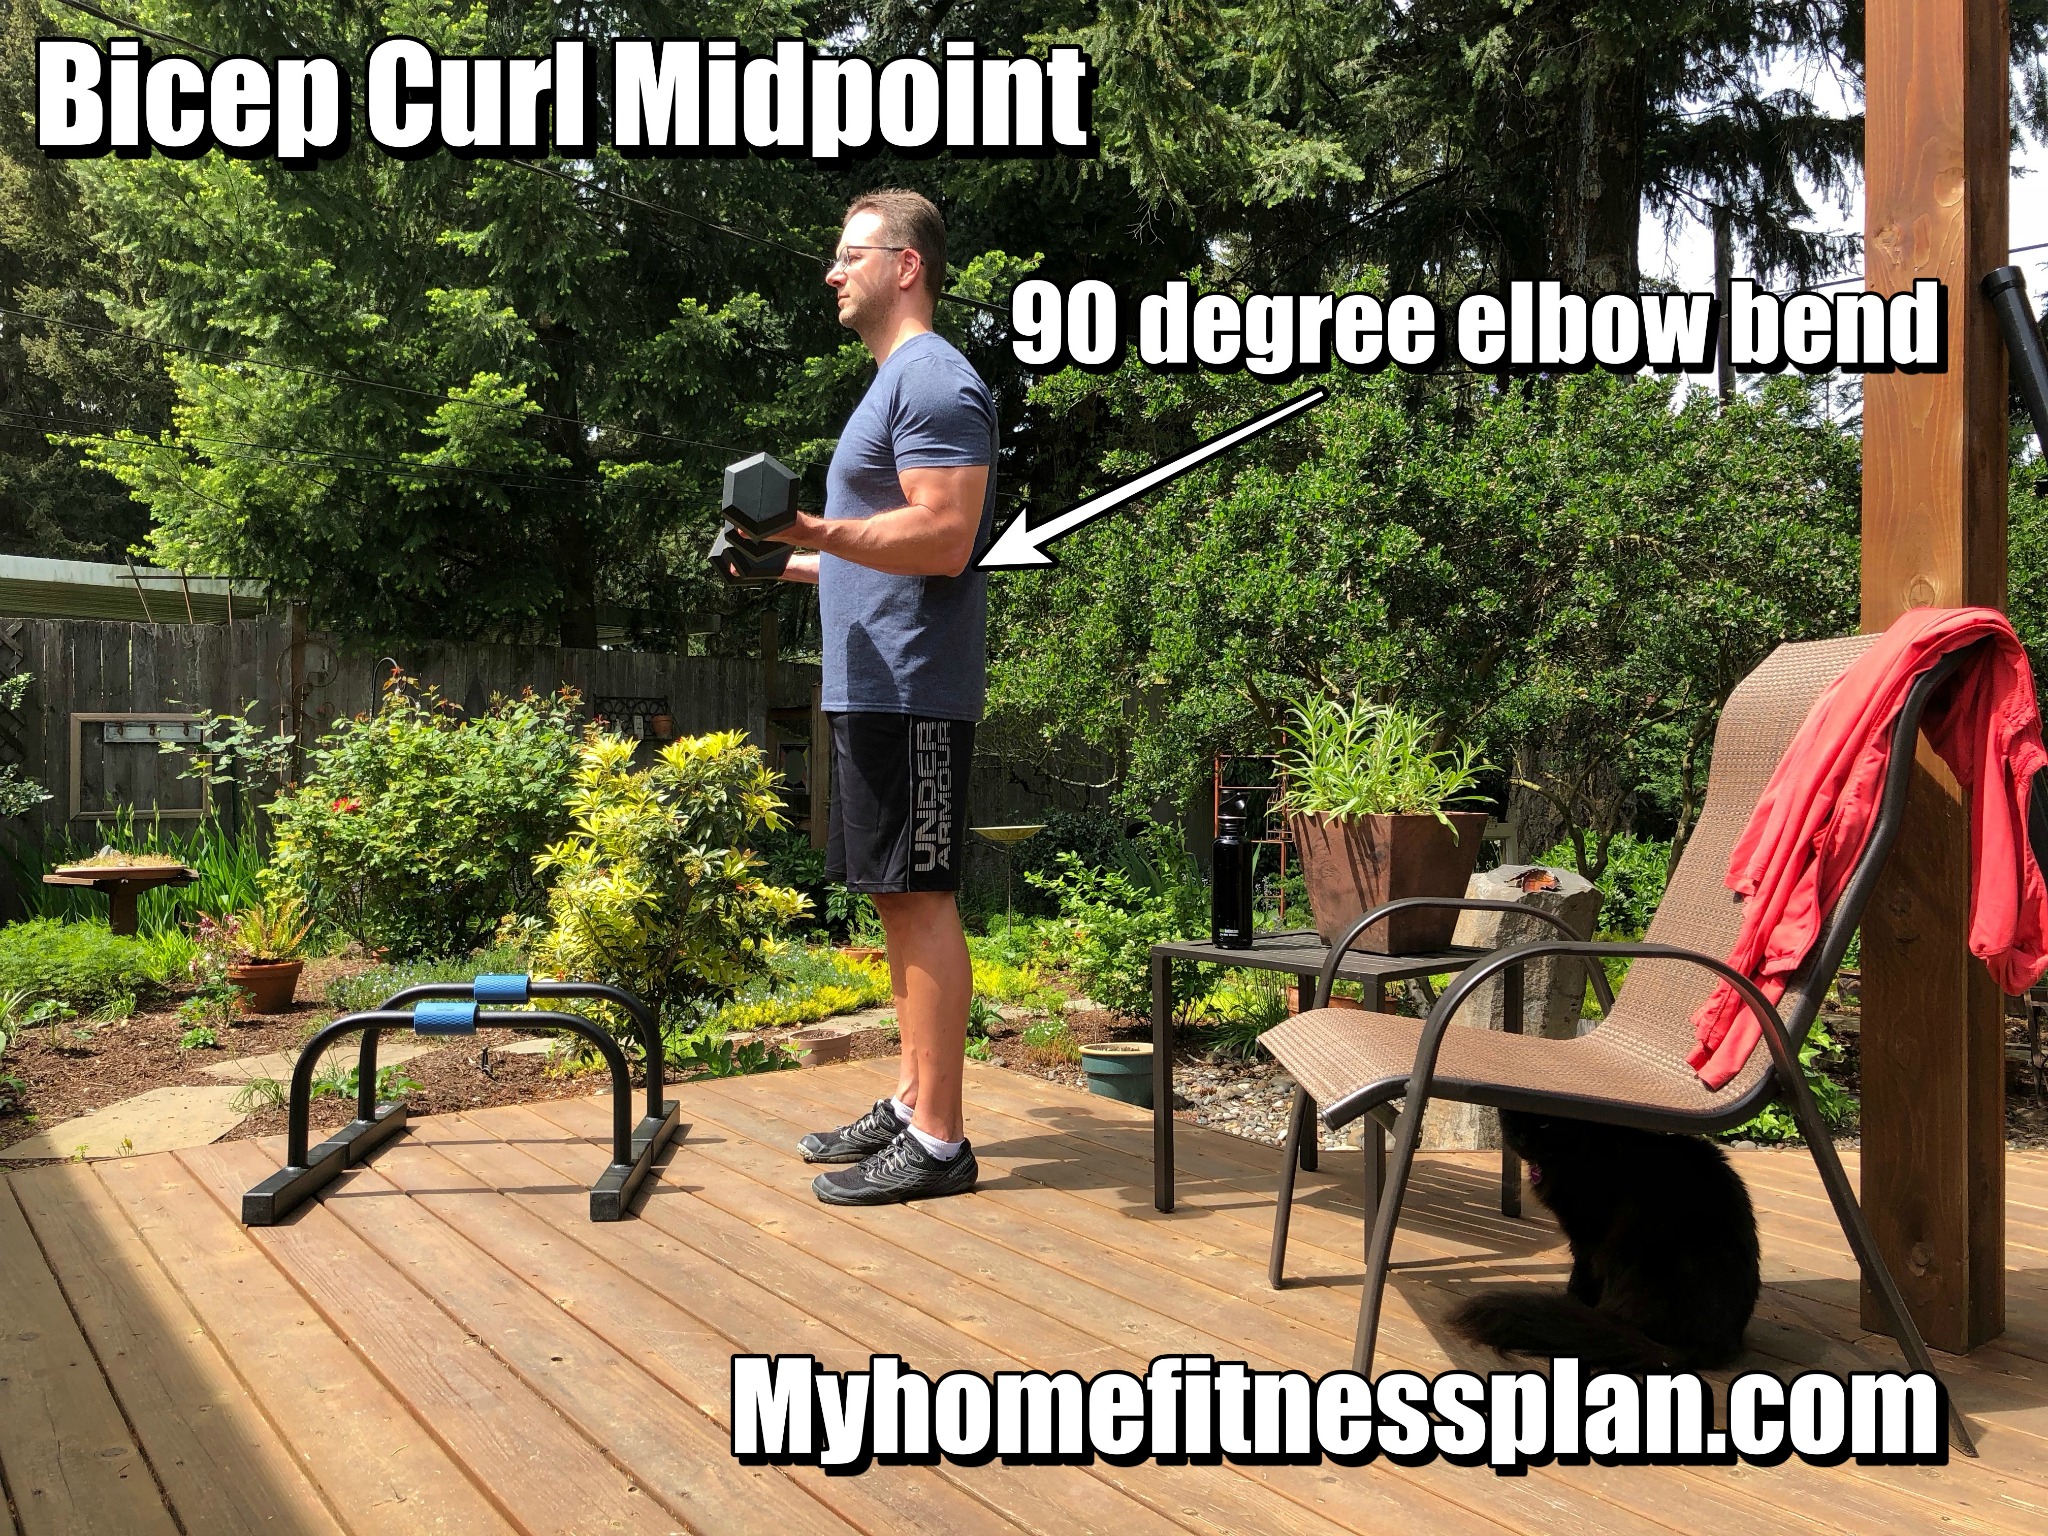
- Begin to slowly lift the dumbbell by bending at the elbow and keeping it next to your side. Keep your wrist straight/locked during the entire movement.
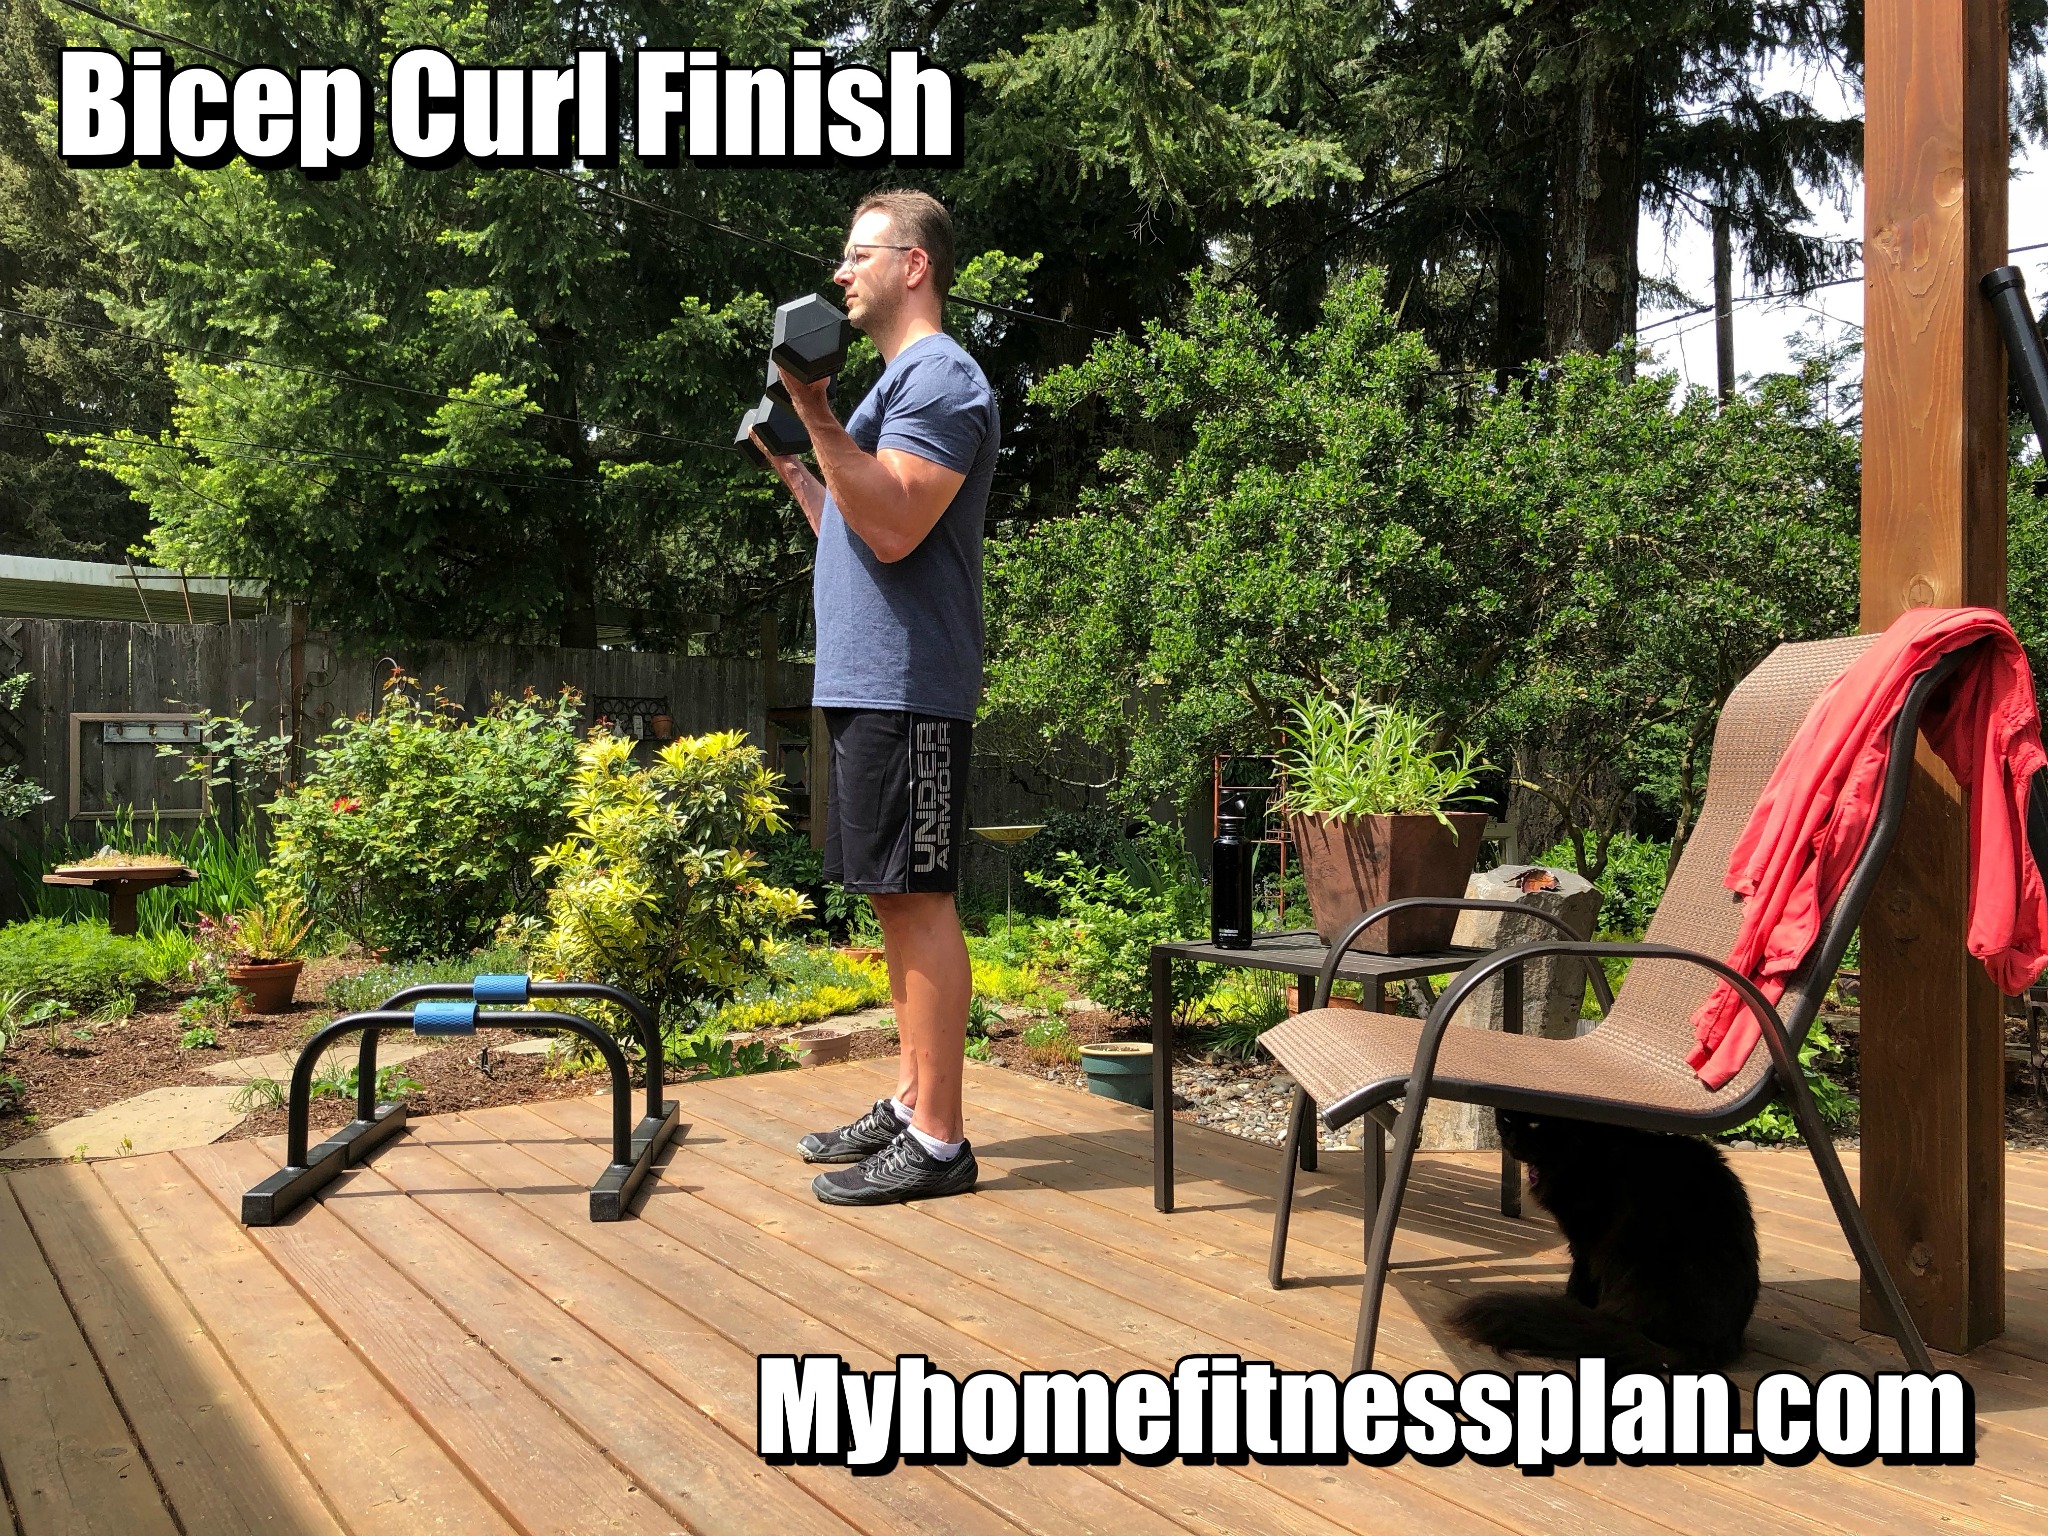
- Stop the movement before the dumbbell touches your shoulder: about 4-6 inches away. This will keep tension on the muscle.
- SLOWLY lower the dumbbell(s) back to the starting position. Take deep breaths into your abdomen (NO shallow chest breathing) while performing this exercise. Working muscles need oxygen. Breathe...all the time.
Number of repetitions- 8 - 12. Pick a weight that challenges you to maintain good form for the final 1 or 2 repetitions. If your form deteriorates, STOP the exercise. It’s not worth getting hurt or developing bad habits to reach a particular number. Save it for the next workout.
Further Reading
6. Plank
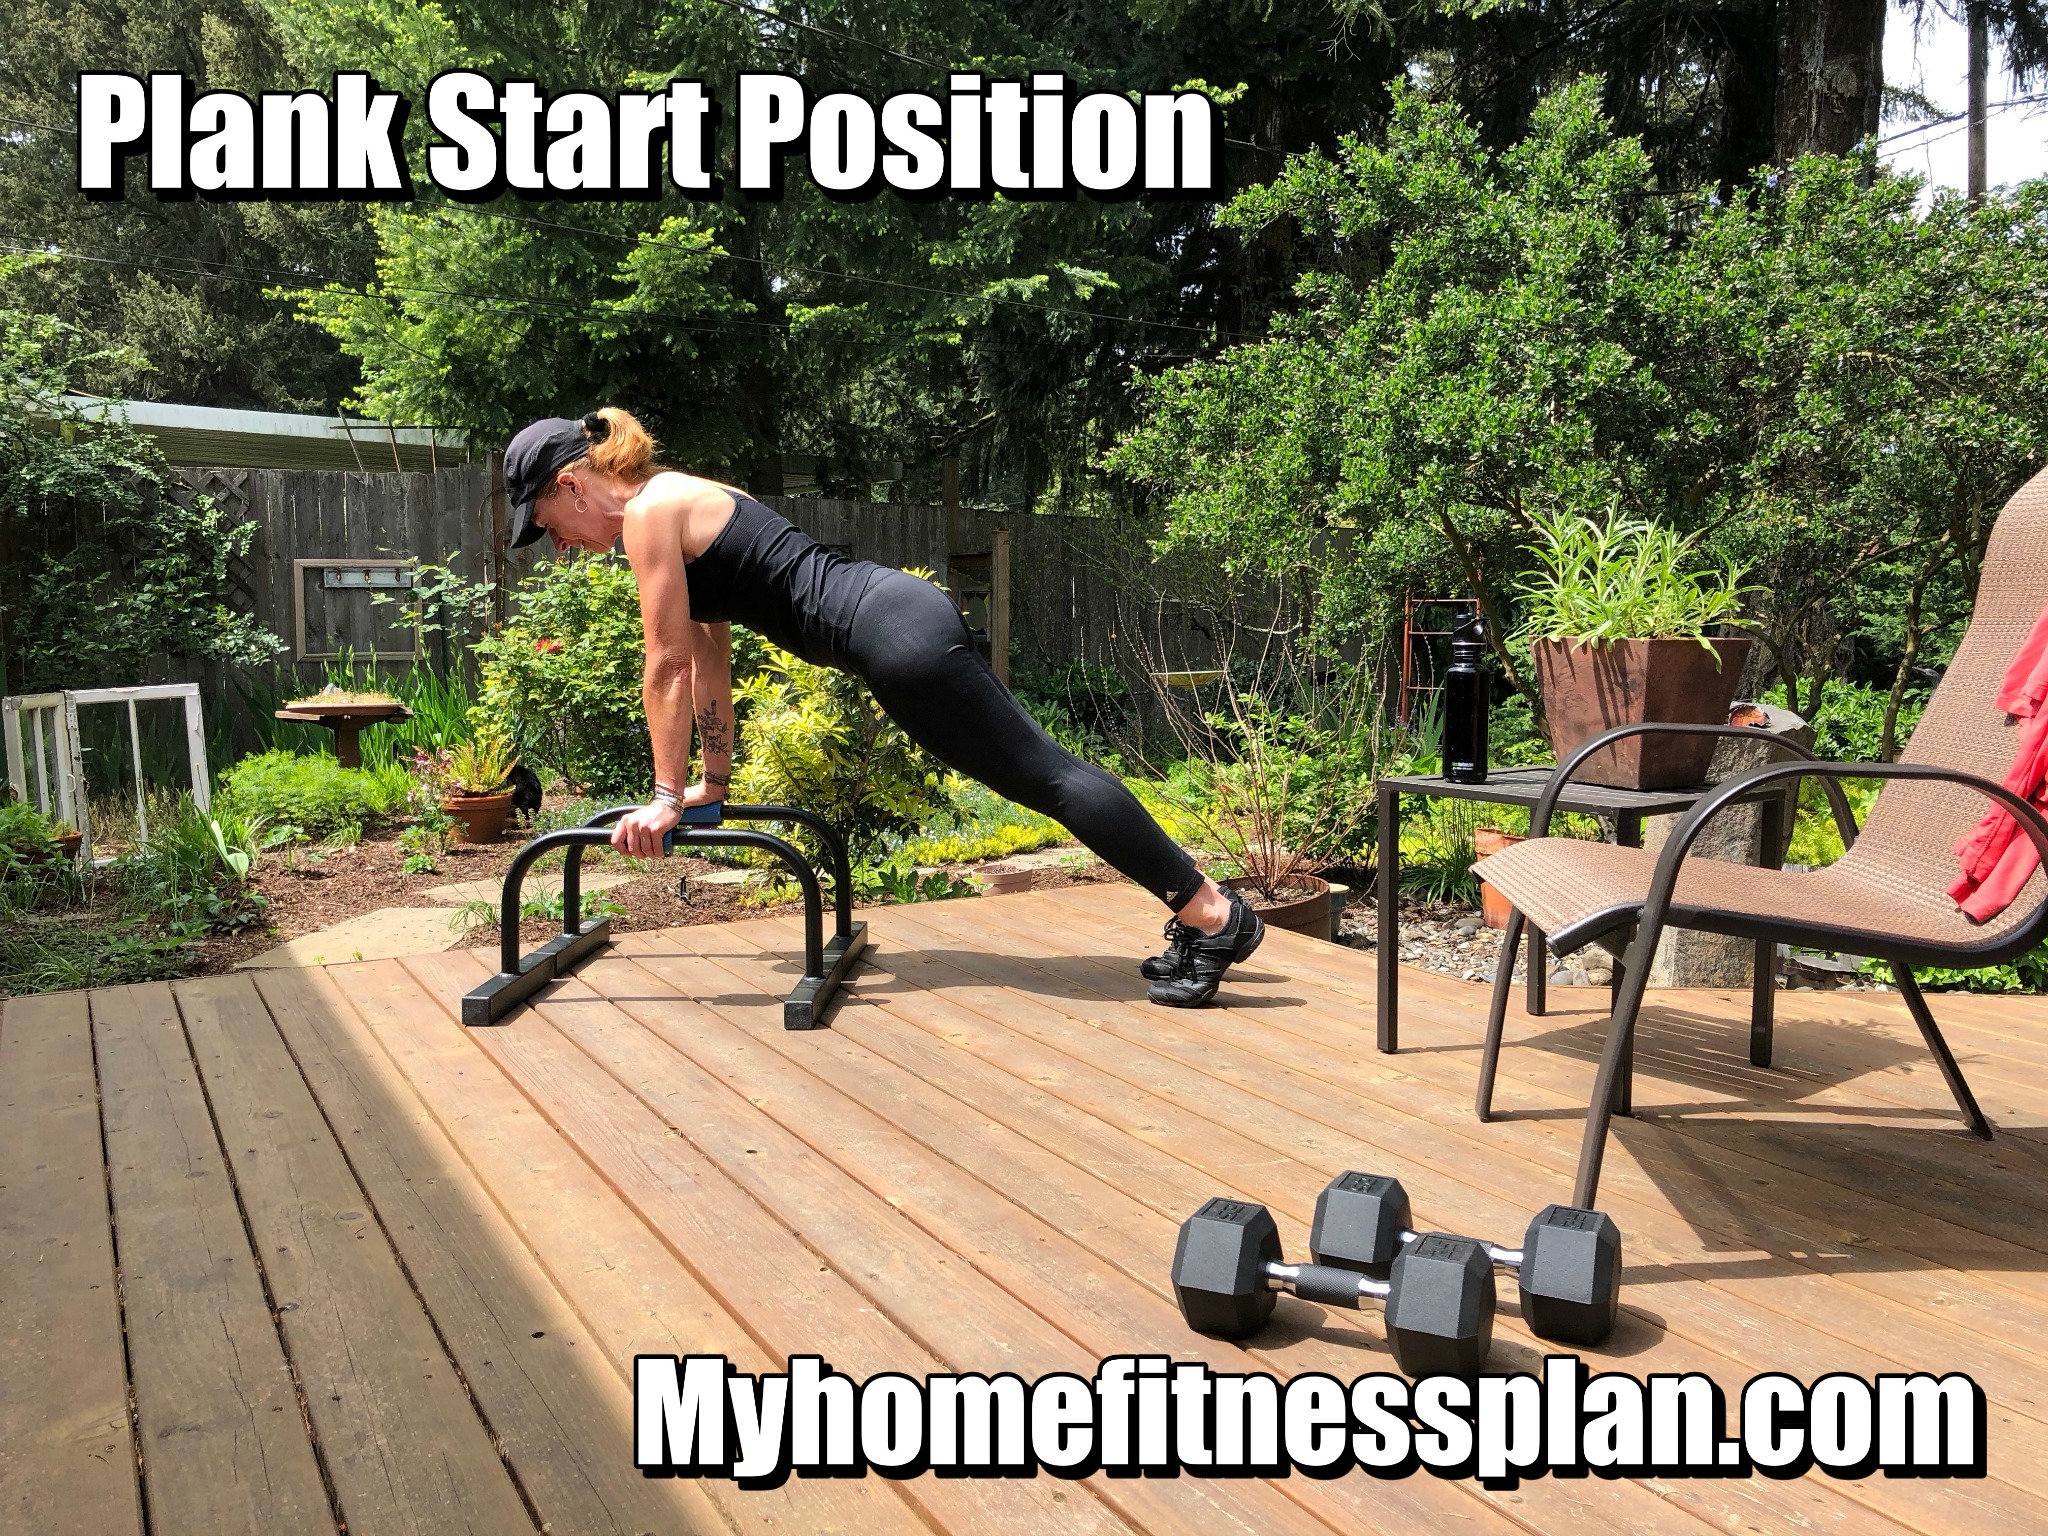
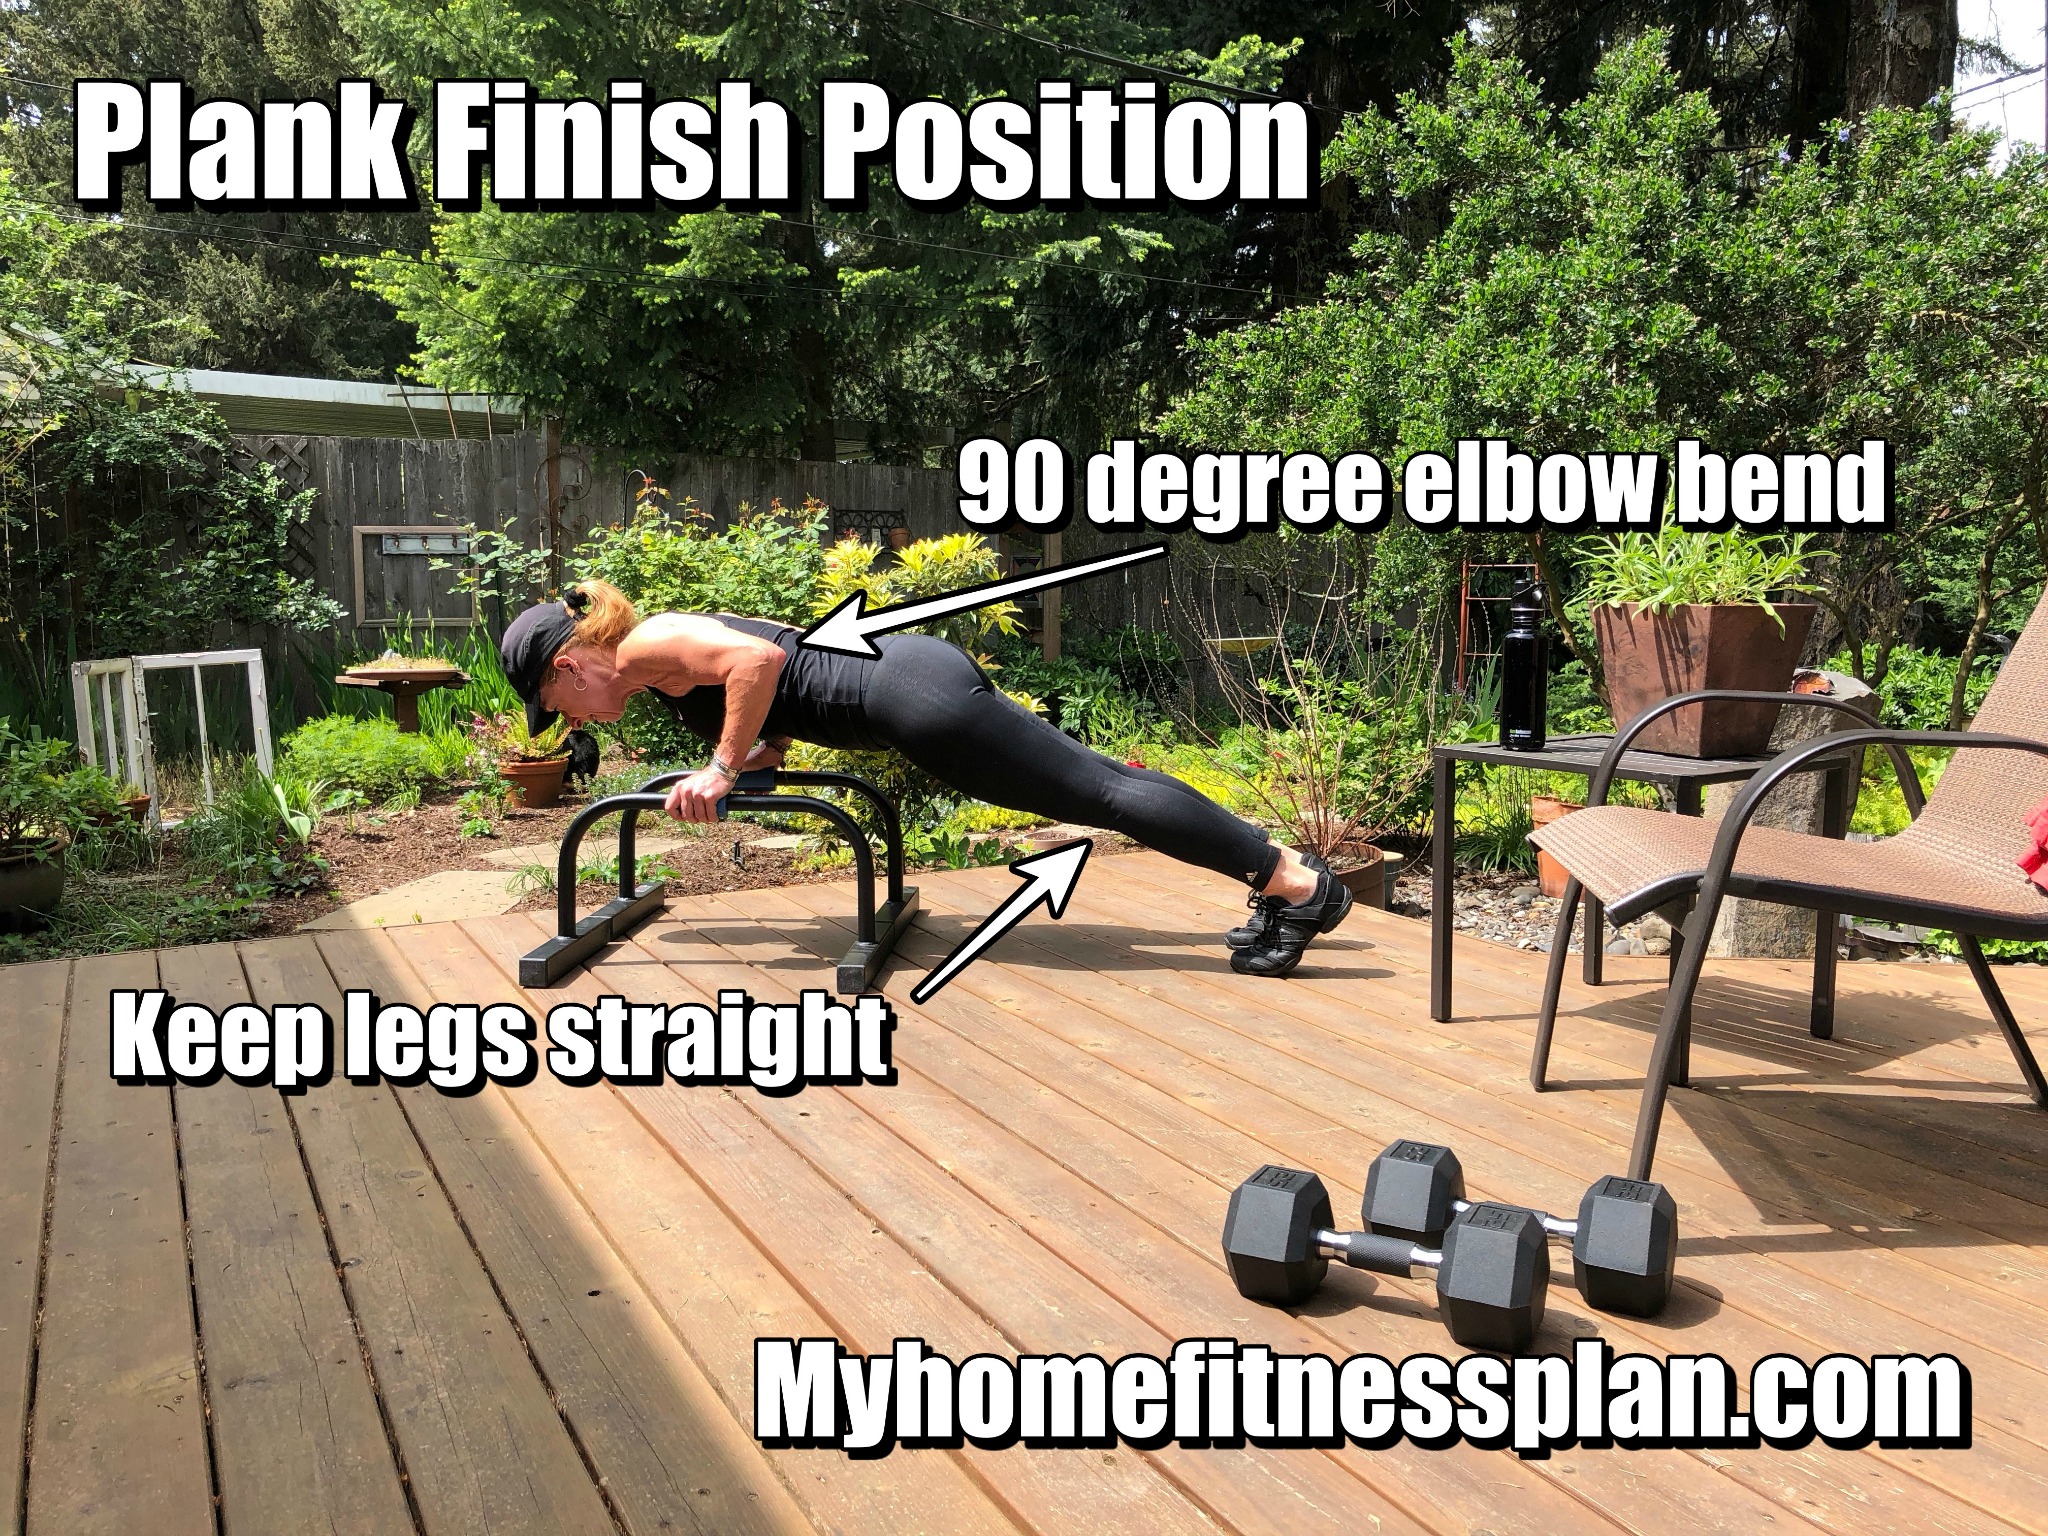
Equipment required- Push up handles or parallettes (as in the photo). Simply placing the hands on the floor is another option; but it may be easier on the joints with a straight, locked wrist, especially if you have Carpal Tunnel Syndrome or other issues/injuries.
Benefits- Increase strength in the abdominals, glutes, chest, triceps and shoulders. Build confidence holding your bodyweight.
How to perform-
- Firmly grasp handles (if using parallettes or push up stands); otherwise, place palms flat on the floor. Keep arms straight with elbows locked.
- Extend your legs behind you, you should be on your toes. Gently push your heels away from you. No bend in the knees. Maintain a neutral head and neck position.
- Squeeze your abdominals AND glutes. Maintain muscular tension. This will help to protect your lower back. You should be able to draw an imaginary straight line from the back of your head to your heels.
- Lower yourself SLOWLY until your elbows are bent at 90 degrees. You may feel a slight stretch in your chest and shoulders--that’s OK. But don’t overdo it. Take deep breaths into your abdomen (NO shallow chest breathing). Working muscles need oxygen. Breathe...all the time.
Number of repetitions-
- Beginner- Work up to one 30 second hold in the ‘Start’ (arms straight) position. It doesn’t matter if you can only do 5 seconds the first time. You will get stronger.
- Intermediate- One 30 second hold in the ‘Start’ (arms straight) position. Then lower slowly until elbows are approximately bent at 90 degrees and hold for another 30 seconds.
- Advanced- One 60 second hold in the ‘Start’ (arms straight) position.
Then lower slowly until elbows are approximately bent at 90 degrees and
hold for another 30 seconds.

My Home Fitness Plan, 397 North State Street Suite A, Lake Oswego, Oregon 97034, United States
